Teach Your Dog to Open the Fridge in 5 Simple Steps
Teaching your dog to open the refrigerator is more than just a novelty trick; it’s an advanced training exercise that can significantly enhance your dog’s cognitive abilities and strengthen the bond you share. This complex task challenges your dog to think, problem-solve, and follow a multi-step sequence of commands, providing excellent mental stimulation. For canine athletes or dogs that thrive on having a ‘job,’ learning intricate tricks like this can be incredibly rewarding.
However, it is imperative to approach this trick with a strong emphasis on safety and control. This guide is designed for responsible pet owners whose dogs have already mastered foundational obedience. The goal is not for your dog to help itself to food, but to perform a command under your direct supervision. Unsupervised access to a refrigerator can lead to dogs consuming toxic foods, ingesting harmful packaging, or creating a significant mess. Before you begin, assess whether this trick is appropriate for your dog’s temperament and your home environment. This comprehensive guide will walk you through the necessary preparations, a detailed five-step training plan, and essential troubleshooting tips to ensure the process is safe, fun, and successful for both you and your canine companion.
Prerequisites and Essential Tools: Setting Up for Success
Prerequisites and Essential Tools: Setting Up for Success
Before attempting to teach your dog to open the fridge, you must ensure they have a solid foundation in basic and intermediate commands. This is not a trick for a puppy or a newly adopted dog still learning house rules. Success is built upon prior training, patience, and the right equipment.
Required Foundational Skills:
- ‘Touch’ or ‘Target’ Command: Your dog must reliably touch a target (your hand or a target stick) with its nose or paw on cue. This is the cornerstone of the entire process, as you will use it to direct your dog’s attention to the refrigerator.
- Impulse Control: A rock-solid ‘leave it’ and ‘wait’ command are non-negotiable. Your dog needs to understand that the contents of the refrigerator are off-limits, even when the door is open. The trick is about opening the door, not raiding it.
- Positive Association with Training: Your dog should be enthusiastic about training sessions. If your dog shows signs of stress or frustration during learning, this advanced trick may be too much for them. Training should always be a positive and engaging experience.
Essential Tools and Equipment:
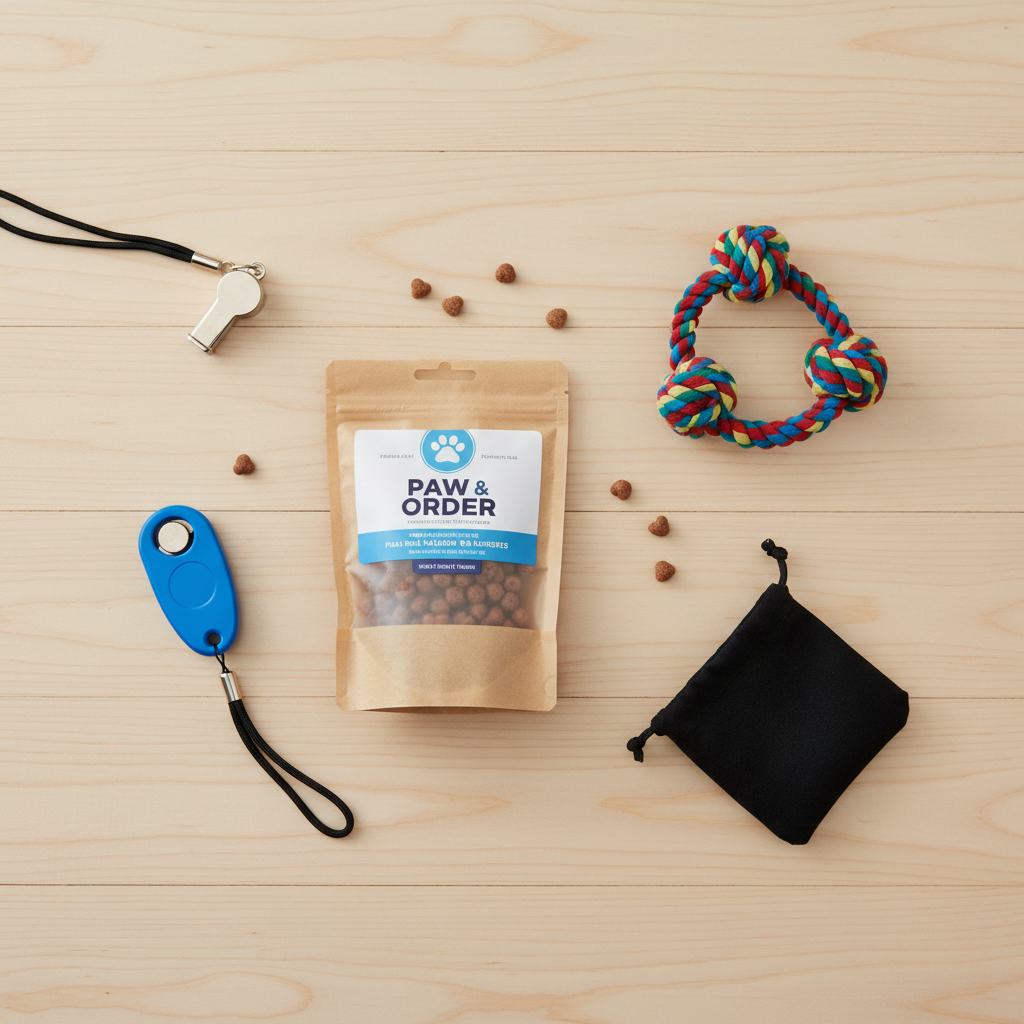
Gathering your tools beforehand will make the training sessions smoother and more effective. You will need:
- High-Value Treats: Use extra-special treats that your dog loves and doesn’t get regularly. Small pieces of cooked chicken, cheese, or commercial training treats work well. The reward must be motivating enough for the effort required.
- A Clicker (Optional): If your dog is clicker-trained, a clicker is an excellent tool for precisely marking the desired behavior (like touching the door or pulling the rope). If not, a consistent verbal marker like ‘Yes!’ can be used instead.
- A Rope Toy or Towel: Choose a sturdy, soft object that is easy for your dog to grip with its mouth. A knotted rope toy or a durable dish towel works perfectly. This will serve as the initial tool for your dog to pull the door open.
- Non-Damaging Adhesive (Optional): To protect the surface of your refrigerator from potential scratches, you can apply a temporary clear protective film to the area where your dog will be interacting with the door.
Expert Tip: Keep training sessions short and positive, ideally 5-10 minutes at a time. Ending on a successful repetition will keep your dog motivated and eager for the next session. Pushing a dog too hard can lead to frustration and a negative association with the task.
The 5-Step Training Plan to Open the Fridge
The 5-Step Training Plan to Open the Fridge
With your preparations complete, you can now begin the training process. Remember to proceed at your dog’s pace, ensuring they have mastered each step before moving on to the next. Every dog learns differently, so patience is key.
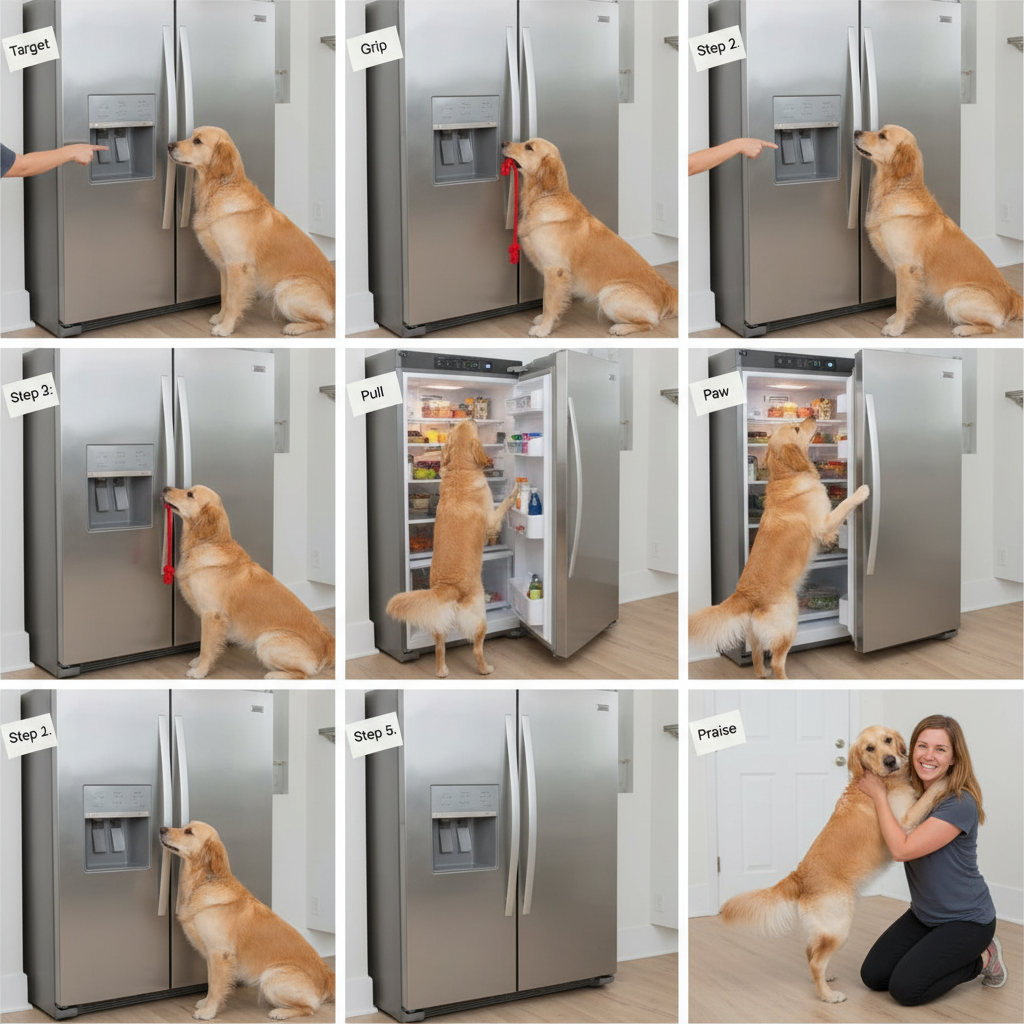
Step 1: Mastering the ‘Touch’ Command on the Fridge
The first objective is to transfer your dog’s existing ‘touch’ command to the surface of the refrigerator. Start away from the handle to avoid confusion.
- Begin by holding your target hand or a target stick near the bottom of the refrigerator door. Give your ‘touch’ cue. When your dog touches it, click (or say ‘Yes!’) and reward them immediately.
- Repeat this several times in the same spot. Once your dog is confidently touching the target, start moving it to different spots on the face of the door.
- The goal is for the dog to understand that the refrigerator door itself is the object to be targeted. Gradually start presenting your hand flatter and flatter against the door until your dog is touching the door directly. Reward this enthusiastically.
Step 2: Introducing the Rope Tug and Associating it with Opening
Now, you’ll introduce the tool your dog will use to pull the door. Securely tie your rope toy or towel to the refrigerator handle. Ensure it’s tied in a way that it won’t easily slip off but is also easy for you to remove later.
- Encourage your dog to interact with the rope. You can use a cue like ‘get it’ or ‘take it.’ Reward any interaction at first, whether it’s a sniff, a nudge, or a bite.
- Gradually refine the behavior, only rewarding when your dog puts the rope in its mouth. Next, reward small tugs on the rope. Make it a fun game of tug-of-war.
- As your dog tugs, secretly use your finger to slightly break the seal of the refrigerator door. The moment the door pops open, give a big reward. This helps your dog build the crucial association: ‘When I pull this rope, the big box opens, and I get a fantastic treat!’
Step 3: Combining the Pull with the Opening Action
This step is where your dog starts to do the work independently. Your goal is to fade your assistance and have the dog’s pull be what actually opens the door.
- Give your cue for the dog to pull the rope. This time, do not assist by opening the door. Wait for your dog to pull with enough force to break the magnetic seal.
- The very first time they manage to pop it open on their own, even a tiny bit, give them a ‘jackpot’ reward—several treats and lots of praise. This is a major breakthrough.
- Continue practicing this step. Do not reward pulls that are not strong enough to open the door. Your dog will learn that only a committed pull results in a reward.
Step 4: Fading the Rope and Targeting the Handle (Optional)
This is an advanced step and may not be necessary or suitable for all dogs or refrigerator types. If your fridge handle is easy to hook with a paw or you prefer a cleaner look, you can transition from the rope to the handle itself. If you’re happy with the rope, you can skip this and move to Step 5.
- Remove the rope toy. Use your ‘touch’ command to ask your dog to target the handle directly. Reward any touch to the handle.
- Shape the behavior by rewarding touches that are closer to the side of the handle where they would need to pull. You can encourage them to ‘hook’ their paw around it.
- This step requires significant dexterity and may cause scratching. Only proceed if your dog is gentle and your refrigerator surface is protected. For many, the rope method remains the safest and most effective final behavior.
Step 5: Adding a Verbal Cue and Proofing the Behavior
Once your dog is reliably opening the door (with or without the rope), it’s time to formalize the command and ensure it’s reliable.
- Start saying your chosen verbal cue, such as ‘Open,’ or ‘Get a drink,’ right before your dog begins the pulling action. With repetition, the dog will associate the phrase with the entire sequence.
- Begin proofing the behavior. Ask for the command from a few feet away. Practice with you standing in different positions in the kitchen. The goal is for the dog to perform the action based on the verbal cue alone, not just your body language.
- Crucially, you must now heavily reinforce the ‘wait’ command. As soon as the door is open, give your ‘wait’ cue. Reward the dog for staying put and not diving into the fridge. The reward comes from you, not from the contents of the refrigerator. You can also teach a ‘close it’ command by rewarding them for nudging the door shut.
Troubleshooting Common Issues and Safety Considerations
Troubleshooting Common Issues and Safety Considerations
Even with a perfect plan, you may encounter challenges. Furthermore, the safety of your dog and the integrity of your appliance are paramount. Here’s how to address common problems and reinforce safe practices.
Common Training Hurdles
| Problem | Solution |
|---|---|
| My dog is scratching the refrigerator door. | Focus on rewarding a gentle nose touch rather than a paw touch. Apply a temporary protective film to the door. Ensure your dog’s nails are trimmed regularly. If scratching persists, stick to the rope-tug method exclusively. |
| My dog won’t pull hard enough to break the seal. | The magnetic seal might be too strong. You can test it yourself. Increase the value of the reward to build motivation. Turn the training into a more energetic game of tug to encourage a stronger pull. Ensure the rope is positioned for optimal leverage. |
| My dog is losing interest or seems frustrated. | The training sessions are likely too long, or the steps are progressing too quickly. Revert to the last step where your dog was successful and confident. Keep sessions short (under 5 minutes) and always end on a positive, successful repetition. |
| My dog now thinks the fridge is a toy. | This trick should only be practiced during designated training sessions. Do not allow your dog to paw at or interact with the fridge outside of these times. If they do, redirect them to a more appropriate activity. The command should be under your control. |
Critical Safety Protocols
- Supervision is Mandatory: Never, under any circumstances, allow your dog to perform this trick unsupervised. It is a command to be executed in your presence only. A dog with free access to a refrigerator is a danger to itself.
- Reinforce ‘Leave It’: The most important companion skill to this trick is an iron-clad ‘leave it.’ Practice this command around the open refrigerator regularly. The reward for opening the door must always come from you, not from the food inside.
- Secure Dangerous Items: Be mindful of what is stored in your refrigerator door. Items like glass bottles, medications, or toxic foods (grapes, chocolate, onions) should be stored securely where a dog could not accidentally access them if the door were to swing open.
- Consider the ‘Why’: Remember the purpose of this trick is for mental enrichment and bonding. It is not intended to be a practical method for your dog to retrieve items. Keep the focus on the fun of the training process and the impressive final result as a demonstration of your dog’s intelligence.
Conclusion
Teaching your dog to open the refrigerator is a rewarding journey that showcases the incredible potential of canine intelligence and positive reinforcement training. By following these five steps—establishing a target, introducing a pull rope, combining the actions, fading the prompt, and proofing the command—you can guide your dog to master this impressive feat. Remember that success hinges on a foundation of patience, consistency, and a deep understanding of your dog’s learning style.
Above all, prioritize safety. This trick must be treated as a supervised activity, reinforced with strong impulse control commands like ‘wait’ and ‘leave it.’ The ultimate goal is not convenience, but the shared experience of working towards a complex goal, strengthening your communication, and providing your dog with a stimulating and enriching challenge. When done responsibly, the pride you’ll feel in your clever companion—and the amazed looks from your friends and family—will be well worth the effort.