How to Take Studio-Quality Dog Photos in Your Living Room

Capturing the unique personality of your canine companion in a photograph is one of the most rewarding experiences for a pet owner. While professional pet photographers deliver incredible results, scheduling and cost can be prohibitive. The great news is that you don’t need a high-end studio to create breathtaking, professional-quality portraits of your dog. With the right knowledge and a few key pieces of equipment, you can transform your own living room into a capable photo studio.
This comprehensive guide is designed for pet owners who want to elevate their photography skills. We will move beyond simple smartphone snapshots and delve into the fundamental principles of lighting, composition, and canine cooperation. By following these expert steps, you will learn how to control your environment, work effectively with your dog, and use post-production techniques to produce images that are not only beautiful but also timeless keepsakes. Whether you have a DSLR or a modern smartphone, this guide will provide the actionable advice you need to start capturing your dog’s best angles today.
Essential Equipment and Home Studio Setup
Setting the Stage for Success
Before you can capture that perfect shot, you need to prepare your space and gather your tools. The term ‘studio’ might sound intimidating, but a home setup can be surprisingly simple and affordable. The goal is to create a controlled environment where you manage the background, lighting, and your dog’s comfort.
Your Camera: From Smartphone to DSLR
The best camera is the one you have, but understanding its capabilities is key. A modern smartphone with a portrait mode can produce fantastic results, especially for online sharing. For those seeking higher resolution and more control, a DSLR or mirrorless camera is ideal. If using a dedicated camera, a prime lens (like a 50mm f/1.8) is an excellent, budget-friendly choice for pet photography as it performs well in lower light and creates beautiful background blur (bokeh), making your dog the star of the show.
Creating the Perfect Backdrop
The background can make or break a photo. A cluttered living room is distracting. Your objective is to isolate your subject.
- Solid Walls: The easiest solution is a plain, neutral-colored wall. White, gray, or beige walls work wonderfully as they don’t cast strange colors onto your dog’s fur.
- Fabric Backdrops: For more versatility, you can purchase or create a backdrop. A simple, wrinkle-free sheet or a piece of fleece in a solid color (gray is a professional favorite) can be hung over a curtain rod or taped to the wall. Avoid shiny fabrics that create glare.
- Seamless Paper: For a true studio feel, rolls of seamless paper are available online. They provide a perfectly smooth, creaseless background.
Position your backdrop in an area with ample space, allowing you to place your dog a few feet in front of it. This separation is crucial for creating depth and achieving that professional, blurred background effect.
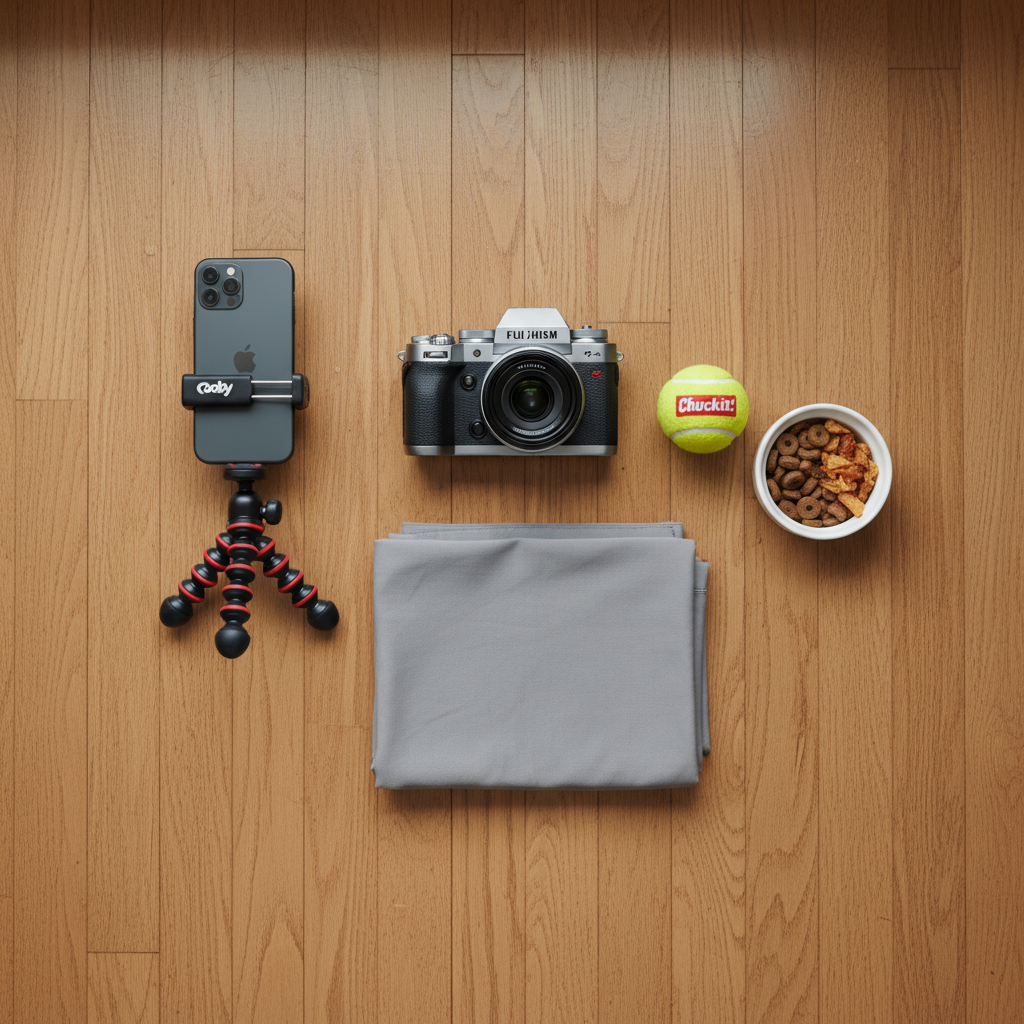
Essential Accessories
Beyond the camera and backdrop, a few other items are critical for a smooth and successful photoshoot.
| Accessory | Purpose and Recommendation |
|---|---|
| Tripod | Provides stability for your camera or smartphone, preventing blurry photos, especially in lower light. It also frees your hands to interact with your dog. |
| Treats & Toys | These are your most important tools for getting and keeping your dog’s attention. Use high-value treats that your dog loves but doesn’t get every day. A favorite squeaky toy can be used to direct their gaze. |
| Leash & Collar | Even in an indoor setting, a thin leash can help you position your dog. Choose a simple, thin leash and a plain collar that can be easily removed in post-production editing if desired. |
| Assistant | Having a second person to help can be invaluable. They can hold toys, dispense treats, and help position the dog while you focus on composing the shot and operating the camera. |
Mastering Lighting in a Home Environment
Light is Everything
Lighting is the single most important element in photography. It dictates the mood, clarity, and overall quality of your image. Studio photography is defined by its controlled lighting, and you can replicate this control in your living room without spending a fortune.
Harnessing Natural Light
The most beautiful and affordable light source is the sun. A large window or a set of glass doors can act as a giant softbox, providing soft, diffused light that is flattering for any subject.
- Positioning: Place your backdrop and your dog near the window, but not in direct, harsh sunlight. You want indirect light. Position your dog at a 45-degree angle to the window. This creates soft shadows that define their features and add depth to the image.
- Time of Day: The light is usually softest in the morning or late afternoon. Midday sun can be too harsh and create unflattering, hard shadows. Overcast days are a photographer’s best friend, as the clouds act as a natural diffuser, creating perfect, even light all day.
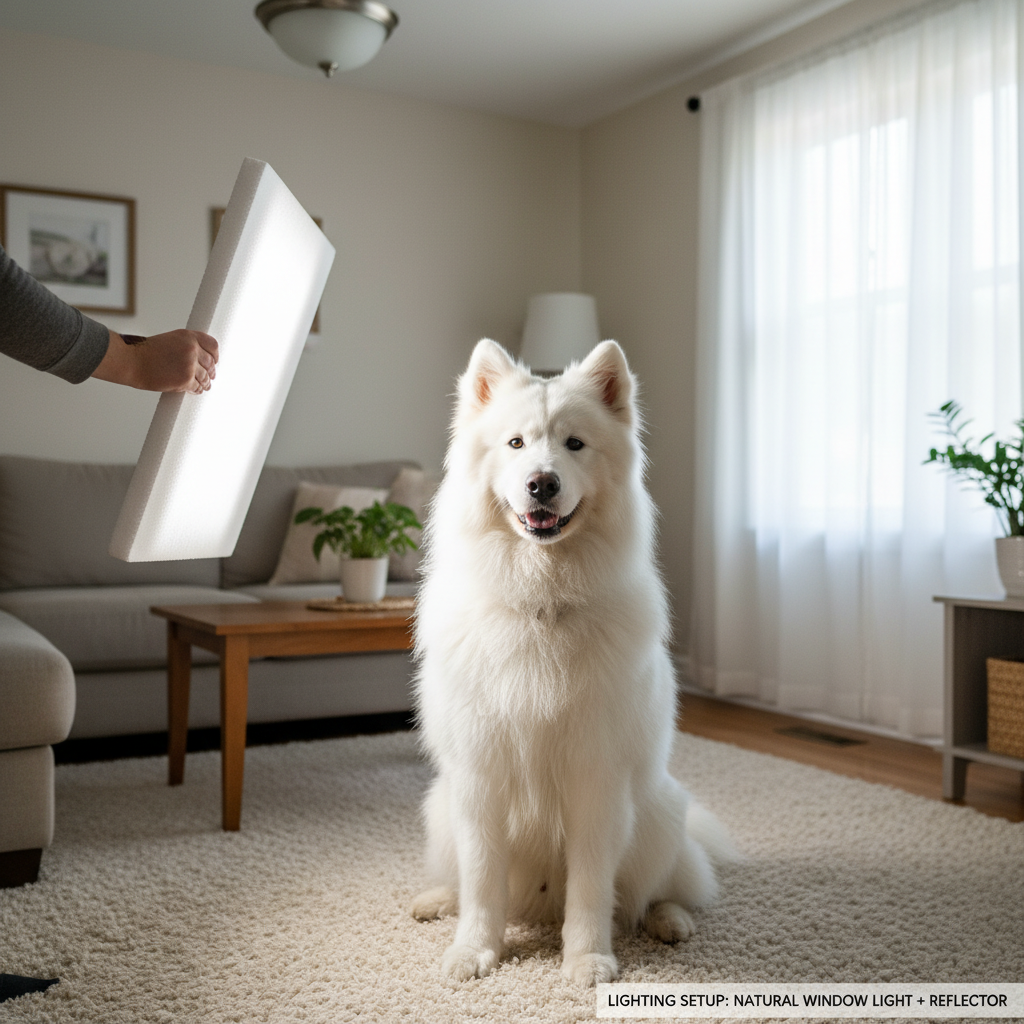
Using Artificial Light Sources
If natural light is limited, you can create your own with simple, affordable equipment.
- Reflectors: A reflector is a simple tool used to bounce light back onto your subject, filling in shadows. You can buy a collapsible 5-in-1 reflector online or make one yourself using a large piece of white foam board or cardboard covered in aluminum foil. Have your assistant hold it opposite your primary light source to brighten the shadowed side of your dog’s face.
- Constant Lights: Unlike a camera flash, constant lights stay on, allowing you to see exactly how the light is falling on your dog before you take the picture. Affordable options include:
- Ring Lights: Popular for their ability to create even light and a distinctive catchlight in the eyes.
- LED Panels/Softboxes: These are excellent for creating soft, diffused light similar to a window. A single softbox placed at a 45-degree angle to your dog can produce stunning, dramatic results.
Expert Tip: Turn off all other lights in the room (lamps, overhead lights). These often have a different color temperature (e.g., warm yellow) than your primary light source (daylight is cool blue), which can result in strange and unflattering color casts on your dog’s fur. Stick to one type of light for a clean, professional look.
Preparing Your Canine Model
A Happy Dog is a Photogenic Dog
Your dog is not a professional model, so patience and preparation are paramount. The goal is to make the photoshoot a fun and positive experience. A stressed or bored dog will not photograph well.
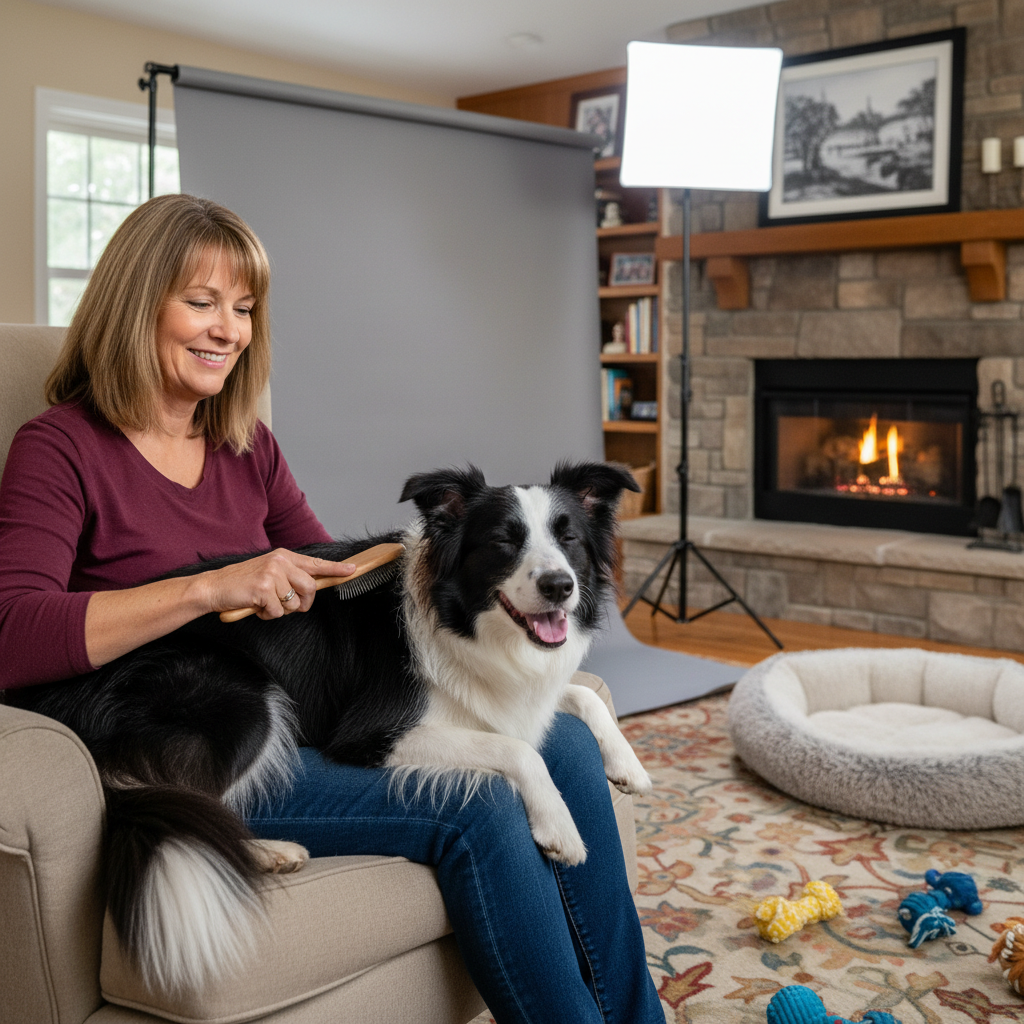
Grooming for the Camera
A little pre-shoot pampering can make a big difference. You don’t need a professional grooming session, but some basic steps will help your dog look their best.
- Brushing: Give your dog a thorough brushing to remove loose fur and ensure their coat is smooth and neat.
- Eye Care: Gently wipe away any ‘eye gunk’ or tear stains with a soft, damp cloth. This is a small detail that makes a huge difference in close-up portraits.
- Trimming (If Needed): If the fur around your dog’s eyes is long and obscures them, a careful trim can help ensure their expressive eyes are the focal point of the photo.
Energy Management
Understanding your dog’s energy level is crucial. A photoshoot requires a dog to be relatively calm and focused. Take your dog for a long walk or have a vigorous play session about an hour before you plan to start shooting. This helps them burn off excess energy, making them more likely to settle down and cooperate. However, don’t exhaust them completely—you still want them to be alert and engaged.
Acclimating to the Studio
The new setup—backdrop, lights, tripod—can be intimidating for some dogs. Set everything up ahead of time and let your dog explore the space on their own terms. Let them sniff the equipment. Reward them with treats for calmly investigating the area. This desensitization process turns a potentially scary environment into a positive one associated with rewards.
Behavioral Tip: Keep training sessions short and sweet. A dog’s attention span is limited. Aim for 5-10 minute shooting intervals, followed by a play break. This prevents frustration for both you and your dog and keeps the experience enjoyable.
The Photoshoot: Posing, Perspective, and Camera Settings
Capturing the Perfect Moment
With your set prepared and your model ready, it’s time to start shooting. This is where technical skill and your connection with your dog come together.
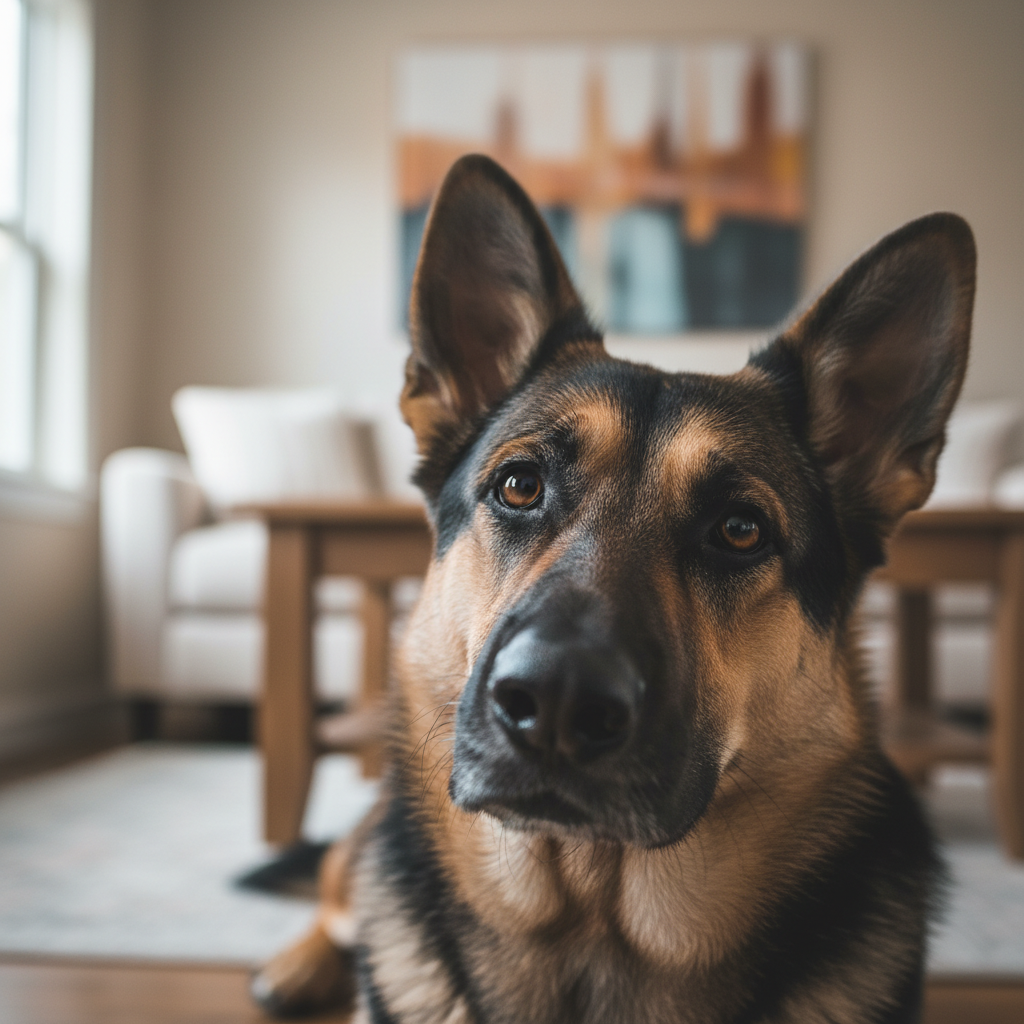
Perspective is Key: Get on Their Level
The most common mistake in pet photography is taking photos from a standing position, looking down at the dog. This perspective is unflattering and creates a sense of detachment. For truly intimate and engaging portraits, you must get down on your dog’s level. Lie on your stomach or sit on the floor. This eye-level perspective draws the viewer into the dog’s world and creates a much more powerful and professional image.
Directing Your Model: Posing and Expressions
You can’t tell your dog to ‘smile,’ but you can use sounds and treats to elicit a variety of charming expressions.
- The Head Tilt: The holy grail of dog portraits. Make a new and interesting sound (a squeak, a whistle, a strange word) to pique their curiosity. Be ready to press the shutter the moment their head cocks to the side.
- The Attentive Look: Hold a high-value treat or a favorite toy directly above your camera lens. This will make your dog look directly into the camera with an alert, focused expression.
- Action Shots: If your dog is playful, have your assistant toss a soft toy in the air or roll a ball. Use a fast shutter speed to freeze the motion for a dynamic action shot.
- Relaxed Poses: Capture moments when your dog is lying down comfortably, perhaps with their head on their paws. These quiet moments can result in beautifully serene portraits.
Essential Camera Settings
If you’re using a DSLR or mirrorless camera, switching to Manual (M) or Aperture Priority (A/Av) mode will give you creative control.
| Setting | Recommendation for Pet Portraits | Why It Matters |
|---|---|---|
| Focus Mode | Continuous Autofocus (AF-C / AI Servo) | This mode tracks your moving subject, ensuring your dog’s eyes stay sharp even if they shift their position slightly. Use a single focus point and place it directly on the dog’s eye. |
| Aperture | f/1.8 – f/4 | A wide aperture (low f-number) creates a shallow depth of field, which blurs the background and makes your dog pop. This is the secret to that professional portrait look. |
| Shutter Speed | 1/250s or faster | Dogs are rarely perfectly still. A fast shutter speed is essential to freeze their motion and prevent blur from their breathing, tail wags, or sudden movements. |
| ISO | 100 – 800 | Keep your ISO as low as possible for the cleanest image. Only increase it if you cannot achieve a fast enough shutter speed with your current aperture and lighting. |
If using a smartphone, tap on your dog’s eye on the screen to set the focus and exposure point. Use Portrait Mode to automatically simulate the blurred background effect of a wide aperture lens.
Post-Production: Editing for a Professional Finish
The Final Polish
Editing is the final step in creating a studio-quality image. A few simple adjustments can transform a good photo into a great one. You don’t need expensive software like Adobe Photoshop; free and user-friendly options like GIMP, Snapseed (mobile), or Adobe Lightroom Mobile offer powerful tools.
Basic Adjustments
Every photo can benefit from these fundamental tweaks.
- Cropping and Composition: Crop the image to improve the composition. Often, a tighter crop can eliminate distractions and strengthen the focus on your dog. Experiment with the rule of thirds, placing your dog’s eyes on one of the intersecting lines for a more dynamic feel.
- Exposure and Contrast: Many photos can be improved by slightly increasing the exposure (brightness) and adding a touch of contrast. This makes the image ‘pop’ and appear more vibrant. Be careful not to overdo it.
- Color Correction: Adjust the white balance to ensure the colors are true to life. If the photo looks too yellow or too blue, the white balance tool can neutralize the color cast. You can also slightly boost the vibrance or saturation to make colors richer, but use a light touch.
Advanced Retouching Techniques
Once the basics are done, you can move on to more specific refinements.
- Sharpening: Apply a small amount of sharpening to your dog’s eyes and fur. This can add a level of crispness and detail that screams professional. Most editing software allows you to apply sharpening selectively.
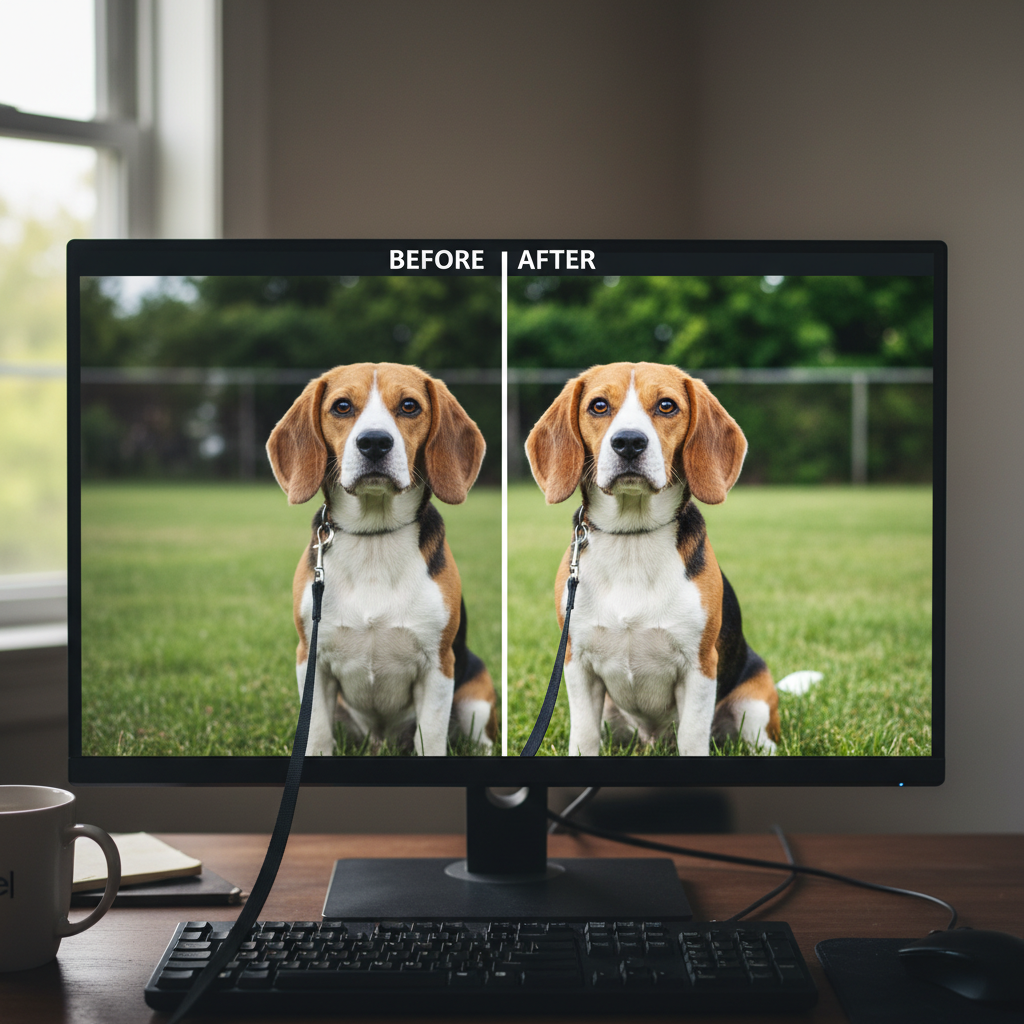
- Removing Distractions: This is a game-changer. Use a ‘healing’ or ‘clone’ tool to remove distracting elements like the leash, a stray piece of lint on the backdrop, or even your assistant’s hand. This cleanup process results in a much cleaner, more polished final image.
- Enhancing the Eyes: The eyes are the window to the soul. In your editing software, you can often selectively brighten the eyes slightly and add a touch of sharpness or clarity. This draws the viewer’s attention directly to your dog’s expression.
Final Check: Before you save your final image, take a break and come back to it with fresh eyes. It’s easy to go too far with editing. The goal is to enhance the photo, not make it look unnatural. The best edits are the ones you don’t notice.
Conclusion
Creating studio-quality photos of your dog in your living room is an achievable and deeply rewarding endeavor. By understanding the fundamentals of setup, lighting, and composition, you can move beyond simple snapshots and begin to create true portraits that capture the essence of your beloved pet. Remember that the most critical elements are patience and a positive attitude. Your dog will feed off your energy, so make every photoshoot a fun, treat-filled game.
Don’t be discouraged if your first attempts aren’t perfect. Like any skill, photography requires practice. Experiment with different lighting setups, poses, and editing styles. With each session, you will learn more about what works for your specific space and your dog’s unique personality. The images you create will serve as beautiful, lasting tributes to the joy and companionship your dog brings into your life.