How To Stop Your Dog From Fearing Crutches, Canes, Or Walkers
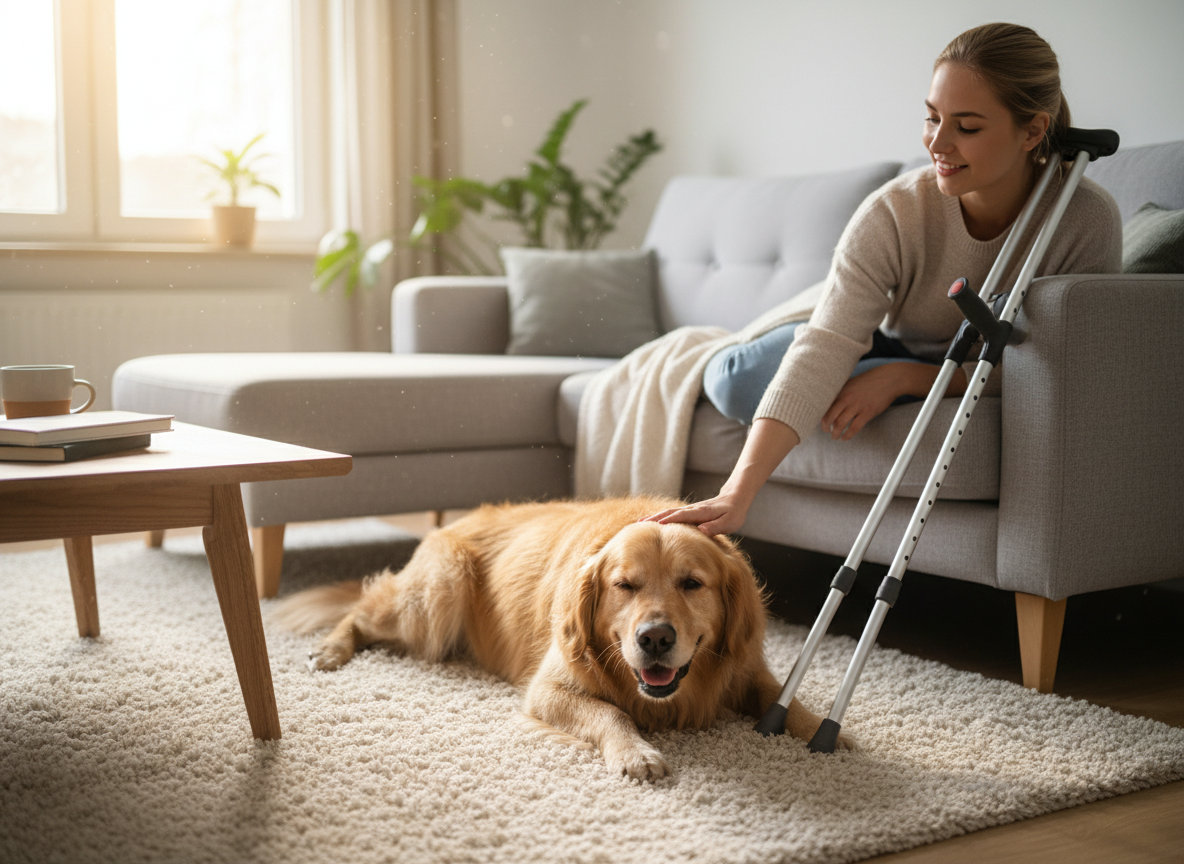
The sudden introduction of crutches, a cane, or a walker into a home can be a jarring experience, not just for the human user, but for our canine companions as well. What we see as a necessary tool for mobility, a dog may perceive as a strange, unpredictable, and noisy intruder. This fear is a common and understandable reaction rooted in a dog’s natural instincts. These objects alter our shape, change the way we move, and often make unfamiliar sounds—all of which can trigger anxiety in even the most confident dog.
Understanding the root of this fear is the first step toward resolving it. Dogs thrive on predictability, and mobility aids are anything but. They may associate the object with an owner’s injury, pain, or stress, creating a negative feedback loop. The goal is not to force acceptance, but to systematically and patiently change your dog’s emotional response from one of fear to one of calm neutrality or even positive anticipation. This guide will walk you through the proven behavioral techniques of desensitization (gradual exposure) and counter-conditioning (changing an association from negative to positive). With patience and consistency, you can transform a mobility aid from a source of terror into just another boring piece of furniture, ensuring a safe and harmonious environment for everyone in your home.
Understanding the Fear: Why Mobility Aids Scare Your Dog

Before beginning any training, it is crucial to empathize with your dog and understand the world from its perspective. A dog’s fear of a mobility aid is not irrational; it is a logical reaction based on its sensory experience and survival instincts. By pinpointing the specific triggers, you can tailor your approach more effectively.
Key Fear Triggers Associated with Mobility Aids:
- Novelty and Unpredictability: Dogs are often neophobic, meaning they have an innate fear of new things. A walker that suddenly appears in the living room is a significant environmental change. Its movement is also jerky and unnatural compared to a human’s normal gait, making it difficult for a dog to predict.
- Unfamiliar Noises: Crutches clatter on hard floors, canes tap, and walkers scrape and click. These sharp, sudden sounds can be startling and trigger a dog’s noise sensitivity or phobia, similar to a fear of thunderstorms or fireworks.
- Altered Human Silhouette and Movement: You are the center of your dog’s universe, and it knows your shape and how you move intimately. When you use a mobility aid, your entire silhouette changes. You become taller, wider, and your movements become asymmetric. This can make you appear as a stranger or a threat in your dog’s eyes.
- Negative Associations (Classical Conditioning): The mobility aid often appears concurrently with a stressful event—an injury. Your dog is highly attuned to your emotions and physical state. It can sense your pain, stress, and anxiety. It may learn to associate the object with the negative feelings it perceives from you or with the painful event itself. If the device has ever been accidentally dropped near the dog or knocked something over, that single startling event can cement a fearful association.
Expert Tip: Never punish your dog for showing fear. Shouting, leash corrections, or forcing your dog to approach the object will only validate its belief that the mobility aid is indeed something to be terrified of. This can severely damage your bond and make the training process significantly more difficult.
Preparation and Tools for Success: Setting the Stage

Successful training is built on a foundation of solid preparation. Before you begin the first session, you must set up the environment for success and gather the necessary tools. The goal is to create a controlled, positive, and low-stress atmosphere where your dog can learn and build confidence at its own pace.
Essential Tools and Environment Setup:
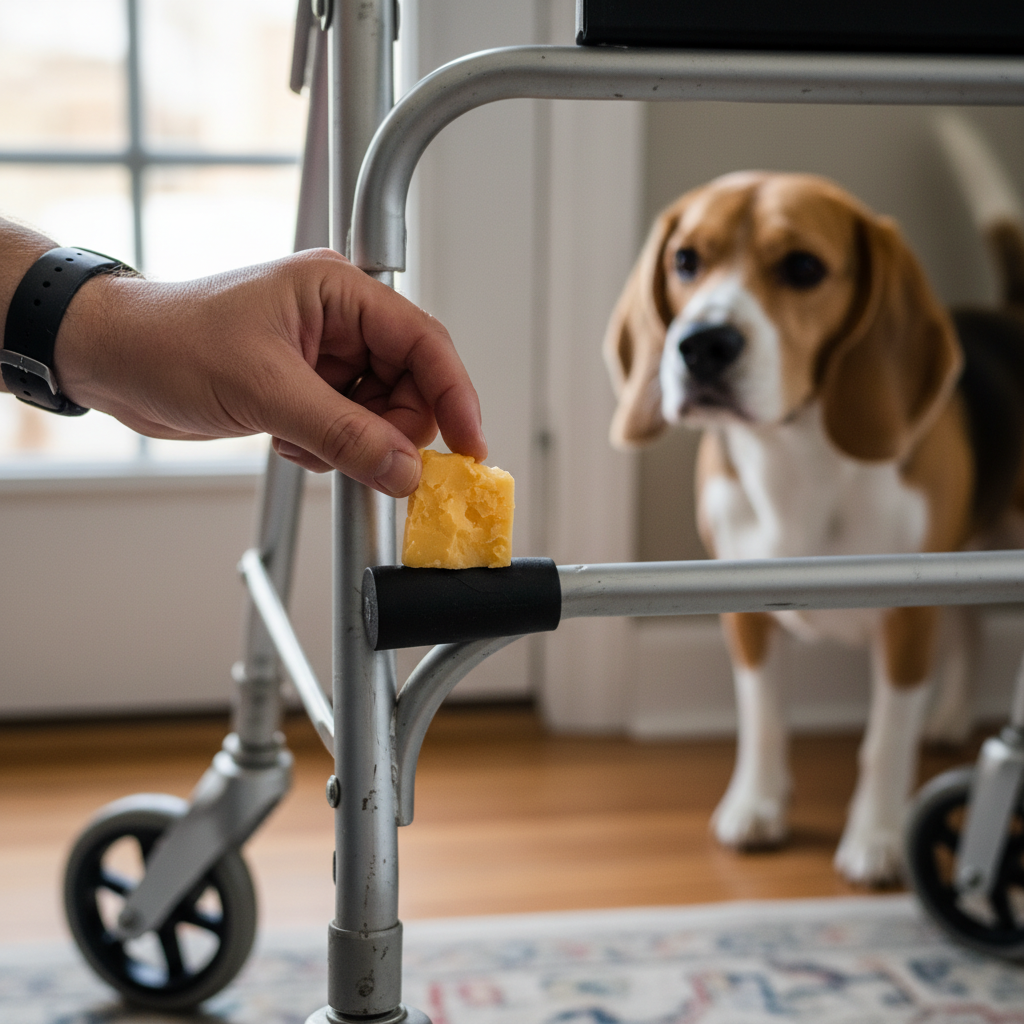
- High-Value Treats: This is the cornerstone of counter-conditioning. Standard kibble will likely not be motivating enough to overcome fear. You need special, high-value rewards that your dog absolutely loves and doesn’t get at other times. Think small pieces of cooked chicken, cheese, hot dogs, or commercial soft training treats. The treat must be more compelling than the fear.
- The Mobility Aid: Have the crutch, cane, or walker present. In the beginning, you may want to modify it to be less intimidating. For example, you can wrap tape around any parts that rattle or place tennis balls on the feet of a walker to muffle its sound.
- A Controlled, Quiet Space: Choose a room where your dog feels comfortable and there are minimal distractions. Close doors, turn off the television, and ask other family members not to interrupt. A familiar environment helps lower baseline stress levels.
- Patience and a Positive Mindset: This is perhaps the most important tool. This process cannot be rushed. You must remain calm, patient, and positive. Your dog will pick up on your frustration, which will only increase its anxiety. Plan for sessions to be very short—just a few minutes at a time—to end on a positive note before your dog becomes stressed or overwhelmed.
Before you even begin the formal steps, spend a day simply having the mobility aid present in the room, far away from your dog’s main living areas (like its bed or food bowls). Let it exist without any interaction. This allows the sheer novelty of the object to wear off slightly before you begin actively training.
The Step-by-Step Desensitization and Counter-Conditioning Process
This process is divided into progressive stages. It is critical that you only move to the next step once your dog is completely comfortable and showing relaxed body language (soft eyes, relaxed ears, loose body) at the current stage. If at any point your dog shows signs of fear (tucked tail, lip licking, yawning, backing away), you have moved too fast. Simply go back to the previous successful step and work there a bit longer.
Step 1: Neutral Introduction from a Distance
Place the mobility aid in the room, completely stationary. Sit down at a comfortable distance from it—a distance where your dog notices the object but is not showing any signs of stress. Any time your dog looks at the object, say “Yes!” or click, and toss a high-value treat to your dog. The treat should be tossed away from the scary object, so the dog does not have to move closer to get its reward. The goal is simple: Look at the scary thing = get a delicious treat.
Step 2: Creating Positive Associations Up Close
Once your dog is comfortable with the object’s presence, you can start building a stronger positive association. While the aid is still stationary, begin placing treats on the floor near its base. Start far away and gradually place them closer. Eventually, place a very high-value treat (like a smear of peanut butter) directly on a safe part of the object itself. Allow your dog to approach and investigate at its own pace. Do not lure or force it. Let your dog’s curiosity and the desire for the treat win. This step teaches the dog that approaching the object predicts wonderful things.
Step 3: Introducing Minor Movement and Sound
This is often the most challenging stage. With your dog at a comfortable distance, gently touch the mobility aid. The instant you touch it, toss a treat. Lift it an inch off the floor, toss a treat. Tap it gently on the floor to make a tiny sound, toss a treat. The key is that the sound or movement predicts the treat. Keep movements small and sounds quiet at first. Over many short sessions, you can gradually increase the intensity: move it a few inches, tap it a little louder. Watch your dog’s body language like a hawk.
Step 4: Incorporating Human Interaction
Now, you will become part of the picture. Sit in a chair with the mobility aid next to you, holding it but keeping it still. Reward your dog for approaching you and remaining calm. Then, practice the small movements from Step 3 while you are holding the device. This helps the dog become accustomed to the object being an extension of you.
Step 5: Simulating Use and Gradual Integration
This is the final stage of training. Start by taking a single, slow, deliberate step using the aid. As you do, toss a handful of treats on the floor for your dog to eat. This is called a “treat scatter,” and it creates a powerful, positive distraction. The goal is for the dog to think, “When that thing moves, a party happens on the floor!” Start with one step, then two. Practice walking slowly across the room, rewarding frequently. Over time, you can decrease the frequency of treats as your dog’s confidence grows and it accepts the mobility aid as a normal part of your daily routine.
Troubleshooting and Common Mistakes to Avoid

Even with the best plan, you may encounter setbacks. Understanding common mistakes can help you avoid them and troubleshoot issues as they arise. The key is to remain flexible and always prioritize your dog’s emotional well-being.
Common Pitfalls in the Training Process:
- Moving Too Quickly: This is the most common mistake. Owners are often eager to solve the problem and push their dog past its comfort threshold. This is known as “flooding” and it can make the fear much worse. Every step must be mastered before moving on. If your dog is scared, you are moving too fast.
- Forcing Interaction: Never drag your dog toward the mobility aid on a leash or physically push it closer. All interactions must be the dog’s choice. Forcing them removes their sense of control and intensifies the fear.
- Punishing Fearful Reactions: Yelling “No!” or using a leash correction when your dog barks, growls, or runs away will only confirm its suspicion that the object is dangerous and associated with negative consequences.
- Inconsistent Training Sessions: Short, frequent sessions (5 minutes, 2-3 times a day) are far more effective than one long, stressful session. Consistency is key to building new neural pathways and positive associations.
- Using Low-Value Rewards: The reward must be valuable enough to outweigh the fear. If your dog isn’t interested in the treats, you need to find something it finds more irresistible.
What if my dog regresses?
Regression is normal in behavior modification. A loud noise, a sudden movement, or a stressful day can cause a temporary setback. Don’t be discouraged. Simply take a few steps back in the training plan to a point where your dog was last successful and build its confidence back up from there. It’s a marathon, not a sprint.
Conclusion
Helping your dog overcome a fear of crutches, canes, or walkers is a profound exercise in communication, patience, and trust. By breaking down the process into manageable steps and consistently applying the principles of desensitization and counter-conditioning, you are not just solving a behavioral problem; you are strengthening your bond. Remember to celebrate the small victories and always view the situation from your dog’s perspective. The ultimate goal is a peaceful coexistence where your mobility aid is no more frightening than a lamp or a chair. Through your dedicated and compassionate training, you can restore a sense of safety and normalcy to your home, ensuring both you and your beloved companion can navigate life’s challenges together, with confidence and without fear.