Hiking Safety: Teach Your Dog To Walk ‘Behind’ On Narrow Trails

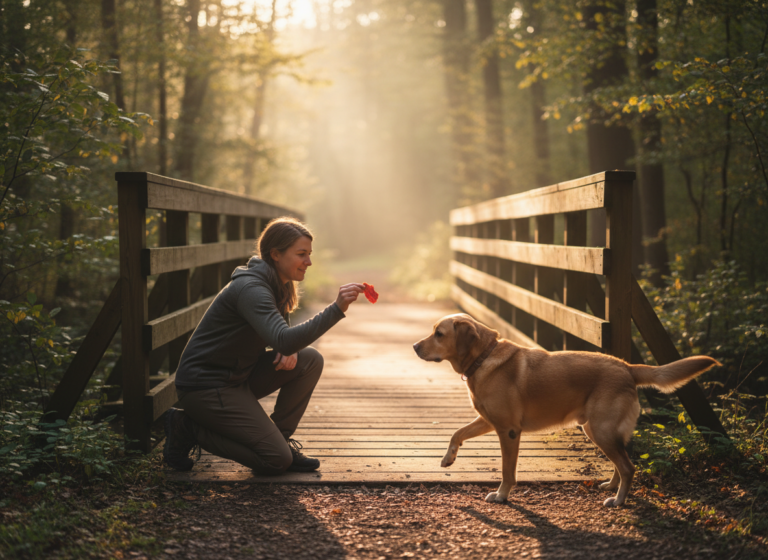
The allure of the great outdoors—the fresh air, the stunning vistas, and the shared adventure—is a powerful draw for many dog owners. Hiking with a canine companion can be one of the most rewarding experiences, strengthening your bond and providing essential physical and mental stimulation for your dog. However, not all trails are wide, open paths. Many of the most beautiful routes are narrow, single-track trails winding along hillsides, through dense forests, or over rocky terrain. On these paths, a standard ‘heel’ command is often insufficient and can even be unsafe.
When you encounter other hikers, wildlife, or navigate a treacherous ledge, you need a reliable way to manage your dog’s position and ensure everyone’s safety. This is where the ‘behind’ command becomes an indispensable tool in your training arsenal. Unlike ‘heel,’ which keeps your dog at your side, ‘behind’ instructs your dog to fall in line directly behind you, creating a single-file formation. This simple adjustment is a cornerstone of trail safety and etiquette, allowing you to pass others courteously and maintain control in tight situations. This guide will provide a comprehensive, step-by-step approach to teaching this crucial skill, empowering you to explore the wild with confidence and peace of mind.
Why ‘Behind’ is a Non-Negotiable Command for Trail Safety

Understanding the Limitations of ‘Heel’ on the Trail
Many dedicated owners have spent countless hours perfecting the ‘heel’ command, where the dog walks politely by their left or right side. While this is an excellent skill for walks around the neighborhood or in open parks, its utility diminishes on a trail that is only a foot or two wide. Attempting to maintain a side-by-side position can lead to several dangerous scenarios:
- Forcing Others Off-Trail: When you meet another hiker, one party must yield. If your dog is at your side, your combined width may force the other person to step off the trail onto unstable ground or into fragile vegetation, which goes against Leave No Trace principles.
- Increased Risk on Ledges: On trails with steep drop-offs, having a dog at your side puts them perilously close to the edge. A sudden lunge after a squirrel or a misstep could have catastrophic consequences.
- Tangled Leashes and Tripping Hazards: In tight quarters, especially when passing other dogs, leashes can easily become tangled, creating a stressful and potentially dangerous situation for everyone involved. A dog at your side also increases the chance of the leash tripping you or others.
The Strategic Advantages of the ‘Behind’ Command
Teaching your dog to walk behind you on cue mitigates these risks and establishes you as a responsible trail user. It is the ultimate expression of control and respect for your shared environment.
Key Benefits Include:
- Safety and Control: You become the leader and buffer between your dog and potential triggers, such as other dogs, approaching mountain bikers, or wildlife. You see the potential hazard first and can manage the situation proactively.
- Proper Trail Etiquette: Yielding the trail becomes simple and clear. By stepping to the side and tucking your dog behind you, you present the smallest possible profile, allowing others to pass with ease and gratitude. The general rule of thumb is that hikers going uphill have the right-of-way, but a hiker with a dog should always be prepared to yield to others to ensure comfort and safety.
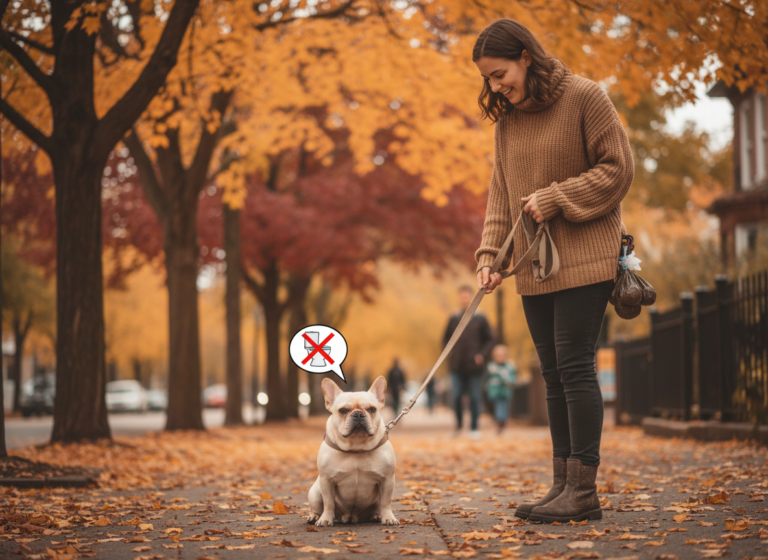
- Reduced Reactivity: For dogs that are anxious or reactive, being behind you can create a sense of security. Your body language and calm demeanor signal that you have the situation under control, which can prevent a reaction before it starts.
- Environmental Protection: Keeping your dog on the narrow path behind you prevents them from trampling delicate flora and fauna on the trail’s edges, helping to preserve the natural beauty you came to enjoy.
Prerequisites and Essential Gear for Success

Before you begin training the ‘behind’ command, it’s crucial to ensure your dog has a solid foundation in basic obedience and that you have the right equipment. Rushing into this specific skill without the prerequisites can lead to frustration for both you and your dog. Think of it as learning to run before you can walk; the foundational skills make the advanced command much easier to grasp.
Foundational Obedience Skills
Your dog should have a reliable understanding of the following before you start:
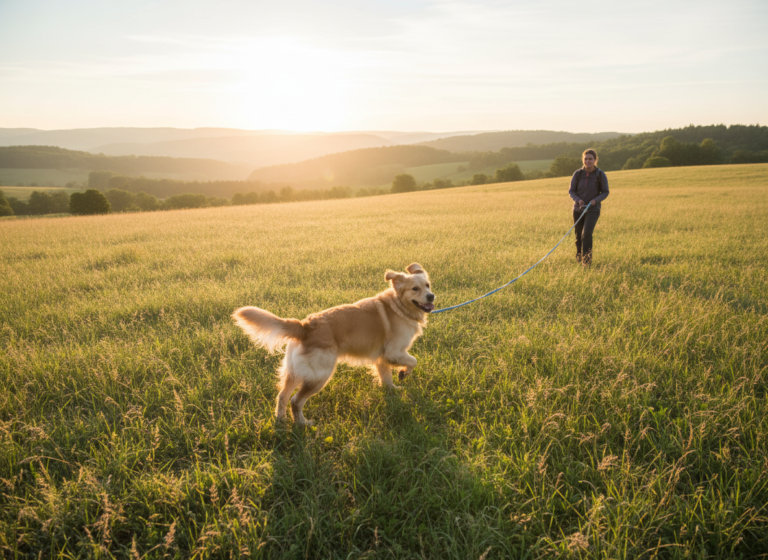
- Loose-Leash Walking: Your dog should already be able to walk on a leash without constant pulling. If your dog is a chronic puller, address this first. The ‘behind’ command is about position, not a fix for pulling.
- A ‘Wait’ or ‘Stay’ Cue: The ability to hold a position is critical. This will be used to reinforce the ‘behind’ position and prevent your dog from surging forward.
- Focus and Engagement: Your dog should have the ability to focus on you, even with mild distractions. Practice ‘look at me’ or ‘watch me’ games to build this skill.
Essential Training and Hiking Gear
Having the right tools will make the training process smoother and safer. Avoid equipment that can hinder communication or cause discomfort.
| Gear Item | Recommendation | Why It’s Important |
|---|---|---|
| Leash | A standard 6-foot, non-retractable leash made of nylon or leather. | Retractable leashes offer little control, can snap easily, and teach dogs to pull. A 6-foot leash provides enough room for the dog to be behind you while keeping them securely connected. |
| Harness or Collar | A well-fitting harness with a back-clip option is ideal. A flat collar is also acceptable if your dog doesn’t pull. | A back-clip harness prevents pressure on the dog’s throat and makes it easier to guide them into position behind you without the leash getting tangled in their legs. Avoid front-clip harnesses for this specific training, as they are designed to turn the dog towards you. |
| Treat Pouch | A wearable pouch for easy access to rewards. | Timing is everything in dog training. Fumbling in your pockets for a treat can cause you to miss the exact moment you need to reward the desired behavior. |
| High-Value Treats | Small, soft, and extra-tasty treats that your dog loves (e.g., small pieces of chicken, cheese, or commercial training treats). | You are teaching a new, sometimes challenging behavior. High-value rewards keep your dog motivated and eager to learn, especially when you move to more distracting environments like a real trail. |
Expert Tip: Before your first training session, let your dog see and smell the high-value treats. This builds anticipation and increases their motivation to work for the reward once the session begins.
The Step-by-Step Training Protocol for the ‘Behind’ Command

Teaching the ‘behind’ command requires patience, consistency, and positive reinforcement. We will break the process down into manageable steps, starting in a low-distraction environment and gradually increasing the difficulty. Remember to keep training sessions short and positive, ending on a successful note.
Step 1: Charging the Cue and Luring the Position (Indoors)
The goal of this step is to introduce the verbal cue and associate it with the physical action of moving behind you.
- Start in a quiet room or hallway with no distractions. Have your dog in a ‘heel’ position or standing at your side.
- Hold a high-value treat in the hand that is on the same side as your dog.
- Say your chosen verbal cue clearly—’behind,’ ‘back,’ or ‘trail up’ are common choices. Use a calm, encouraging tone.
- Immediately after saying the cue, use the treat to lure your dog. Bring your hand from their nose, around your back, guiding them to follow the treat until they are positioned directly behind you.
- Once they are in position, mark the behavior with a ‘Yes!’ or a clicker, and give them the treat.
- Release them from the position with a word like ‘Okay!’ and take a few steps forward to reset. Repeat this process 5-10 times.
Step 2: Fading the Lure and Introducing a Hand Signal
Now, we want the dog to perform the behavior without the treat being directly on their nose.
- Begin as before, but this time, after you say ‘Behind,’ use a more subtle hand signal instead of a full lure. Sweep your hand back behind you in the same motion you used for the lure, but without a treat visible in it.
- When your dog moves into position behind you, mark the behavior (‘Yes!’) and then deliver a treat from your other hand or your treat pouch. This teaches them that the reward comes for the action, not for following the treat itself.
- Practice this until your dog reliably moves behind you with just the verbal cue and the hand signal.
Step 3: Practicing in a Controlled Outdoor Space
Take the training to your backyard or a quiet park on a leash. The introduction of new smells and sights adds a layer of difficulty.
- Walk with your dog in a loose-leash heel.
- Give the ‘Behind’ cue and use your hand signal. Be prepared to use a lure again for the first few repetitions if your dog is distracted.
- When they move behind you, continue walking forward for a few steps with them in that position before marking and rewarding. This starts to build duration.
- Vary the routine. Walk, ask for ‘Behind,’ walk a few steps, release, and repeat.
Step 4: Generalizing with Narrow Spaces
The next step is to simulate a narrow trail. You can do this at home or outside.
- Set up a ‘chute’ using two chairs, a narrow hallway, or even two lines of cones in your yard.
- Walk towards the narrow space with your dog at your side.
- Just before you enter, give the ‘Behind’ command. Guide them into position so you can walk through the space single-file.
- Reward them generously once you have successfully navigated the narrow passage. This helps them build a positive association with moving behind you in tight spaces.
Troubleshooting Common Challenges

Even with a perfect training plan, you may encounter bumps along the road. Anticipating these challenges and having a plan to address them will keep you from getting discouraged. Here are some common issues and their solutions.
| Challenge | Reason It Happens | Solution |
|---|---|---|
| Dog Forges Ahead or Pushes Past | The dog is excited, lacks impulse control, or finds being in front more reinforcing. | Do not pull back on the leash. Instead, stop moving forward completely. Use your ‘wait’ cue. Once the dog is calm, lure them back into the ‘behind’ position and restart. Reward heavily for maintaining the position for even a second or two, then gradually increase the duration. |
| Dog Is Anxious or Fearful Behind You | Some dogs feel vulnerable when they cannot see what’s ahead. This is common in dogs that lack confidence. | Keep initial sessions very short. As soon as the dog is behind you, reward and release. Speak in a reassuring, happy tone. Never force the dog. Build a positive association by making it a fun game that always results in a fantastic reward. |
| Dog is Easily Distracted and Breaks Position | The environment is too stimulating. The reward you’re using isn’t valuable enough to compete with the distractions. | Go back a step to a less distracting environment. Increase the value of your treats—if you were using kibble, switch to chicken. Practice in short bursts and work on general focus exercises separately to build their engagement with you. |
| Dog Doesn’t Understand the Cue | The cue hasn’t been clearly associated with the action, or the training steps were rushed. | Return to Step 1 and focus on luring. Do many repetitions in a distraction-free setting. Ensure your verbal cue and hand signal are consistent every single time. Break the action down into smaller parts if needed. |
A Note on Patience and Consistency
Remember that every dog learns at a different pace. A confident, focused dog may pick this up in a few sessions, while a more anxious or distractible dog may take weeks of consistent practice. The key is to remain patient and positive. Every small success is a step in the right direction. If you find yourself getting frustrated, end the session with a simple command your dog knows well (like ‘sit’) and reward them for it. You can always try again tomorrow.
Proofing the Behavior: From Park Path to Mountain Trail

Once your dog is reliably performing the ‘behind’ command in controlled environments, it’s time to ‘proof’ the behavior. Proofing is the process of teaching your dog to perform a cue reliably in a variety of locations and with different levels of distraction. This is the final and most critical phase to ensure the command will work when you need it most.
Phase 1: Introducing Low-Level Distractions
Start by taking your training to a moderately busy park or a wide, popular walking path.
- Practice on Straightaways: Begin on a wide, straight section of the path. Ask for the ‘behind’ command when you see another person or dog approaching from a great distance. This gives you plenty of time to set your dog up for success. Reward them for holding the position as the person passes.
- Vary Your Pace: Practice giving the cue while walking at different speeds. Your dog needs to learn to stay behind you whether you are moving slowly up an incline or walking at a brisk pace.
- Incorporate Turns: On a winding path, practice the command around gentle curves. This helps your dog learn to maintain their position relative to you, not just a spot on the ground.
Phase 2: Transitioning to Real Trails
Your first few hikes after starting this training should be chosen strategically. Select trails that are familiar to you, relatively wide, and have low to moderate traffic.
When to Use the ‘Behind’ Command on the Trail:
- Approaching Other Hikers: As soon as you spot another hiker, give your ‘behind’ cue. Step to the side of the trail, have your dog sit or stand quietly behind you, and keep a short, relaxed leash. Reward them once the other party has passed.
- Navigating Blind Corners: Before you go around a blind turn, ask your dog to get behind you. This prevents them from surprising another hiker, a horse, or wildlife that might be just around the bend.
- On Narrow Ledges or Bridges: Any time you are on a section of trail where footing is tricky or there is a drop-off, the ‘behind’ command is your best safety tool. It keeps your dog in the safest position—on the inside of the trail, shielded by your body.
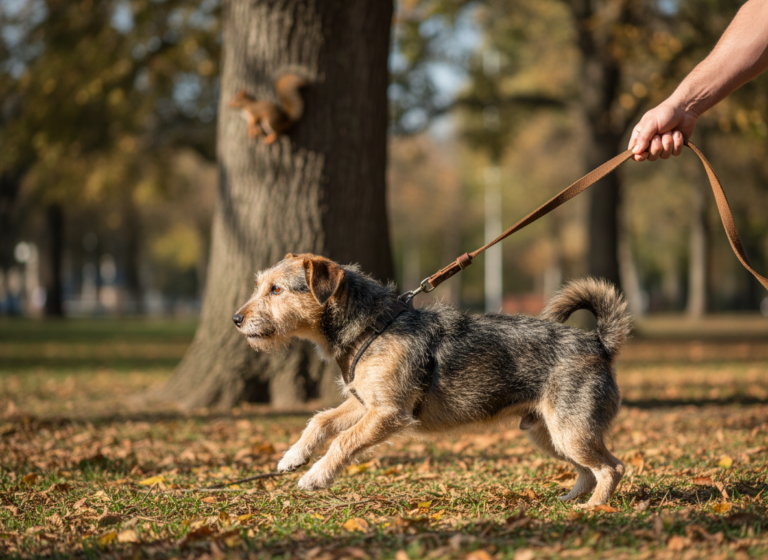
- During Wildlife Encounters: If you spot a deer, squirrel, or other animal, immediately cue ‘behind.’ This control can prevent a dangerous chase and keep both your dog and the local wildlife safe.
Advanced Tip: Combine ‘behind’ with a ‘wait’ command. When you step aside for others to pass, you can cue ‘Behind,’ then ‘Wait.’ This creates a rock-solid, stationary position that is incredibly safe and impressive to fellow trail users. Release the dog only after the other party is well past you.
With consistent practice, the ‘behind’ command will become second nature to your dog. They will learn that tight spaces and approaching hikers are simply cues to tuck in behind their trusted leader. This level of training not only ensures safety but also deepens the partnership you share, allowing you to explore the world together with confidence and mutual respect.
Conclusion
The journey from a crowded sidewalk to a serene mountain trail is one of joy and freedom, but it also comes with a unique set of responsibilities. Teaching your dog to walk ‘behind’ you on narrow trails is more than just a clever trick; it is a fundamental aspect of safe and courteous hiking. It protects your dog from environmental hazards, ensures the comfort of fellow hikers, and respects the delicate ecosystems we are privileged to explore. By investing the time and patience to master this command, you are not only enhancing your control but also building a deeper level of trust and communication with your canine partner.
Remember that consistency is the key to success. Practice in short, positive sessions, gradually increasing the difficulty as your dog’s confidence grows. Celebrate the small victories and don’t be discouraged by setbacks. The effort you put in now will pay dividends in the form of countless safe and stress-free adventures. So, grab your leash, pack your high-value treats, and start building this invaluable skill. The mountains are calling, and with a well-trained companion tucked safely behind you, you’ll be ready to answer that call with confidence.