DIY Dog Diapers: How to Make a Heat Cycle Panty at Home
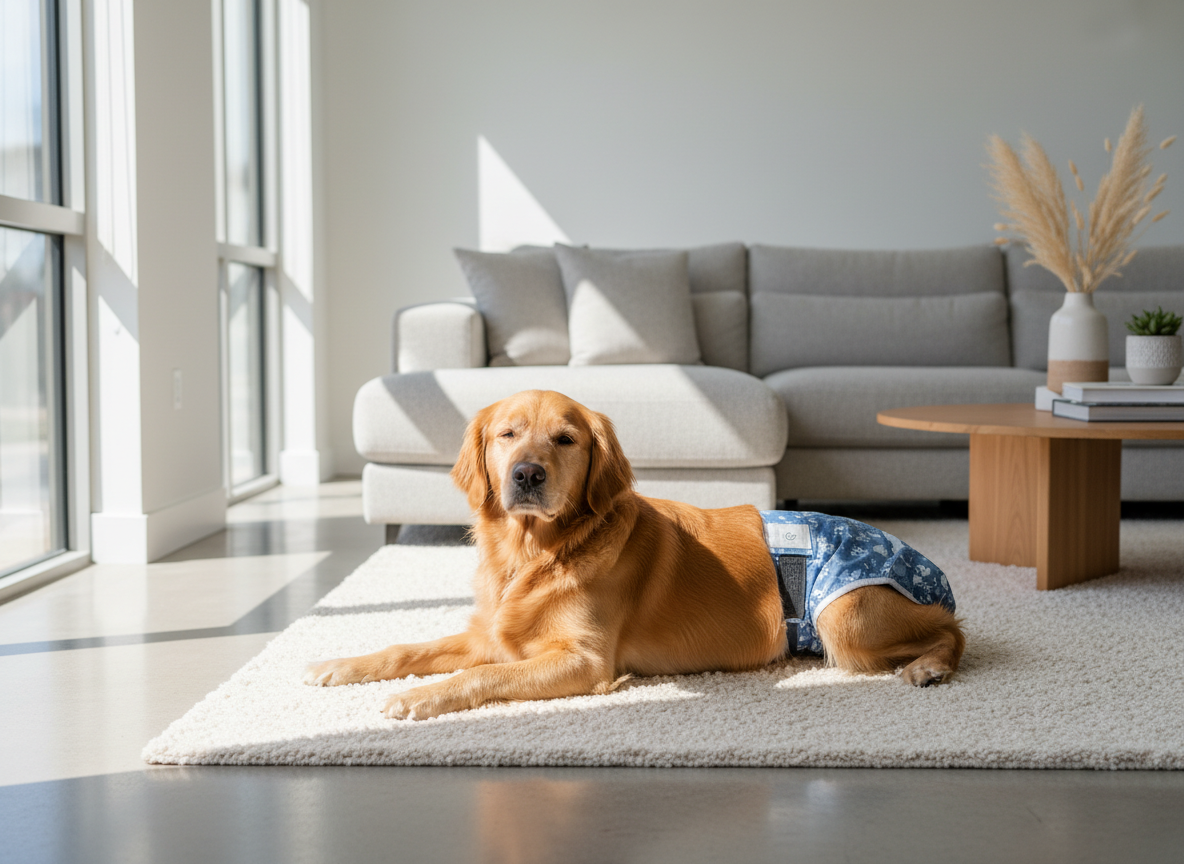
Navigating your female dog’s heat cycle, or estrus, is a natural part of pet ownership. While it signifies she is healthy and reproductively capable, it can also introduce challenges, primarily managing the bloody discharge and maintaining a clean home. Commercial dog diapers are a popular solution, but they can be costly, may not fit every dog perfectly, and contribute to waste. Fortunately, creating a DIY dog diaper or heat cycle panty at home is a practical, effective, and highly customizable alternative.
This guide serves as an authoritative resource for pet owners seeking to craft their own solutions. We will explore several methods, from quick, no-sew options for immediate needs to more durable, sewn panties for long-term use. By following these expert instructions, you can ensure your dog remains comfortable, your home stays clean, and you feel confident and prepared during her heat cycle. Prioritizing your dog’s well-being and hygiene is paramount, and a well-made DIY diaper is an excellent tool to achieve that.
Understanding the Need: Why Use a Heat Cycle Panty?
Before diving into the creation process, it is essential to understand the function and benefits of a heat cycle panty. A female dog typically goes into heat for the first time between six and twenty-four months of age, a cycle that lasts approximately two to four weeks and recurs about twice a year. During this period, she will experience physiological changes, including a bloody vaginal discharge.
The primary purposes of a dog diaper during this time are:
- Household Hygiene: The most immediate benefit is preventing blood from staining furniture, carpets, and bedding. This simplifies cleanup and maintains a sanitary living environment for both you and your pet.
- Preventing Licking: While some licking is normal grooming behavior, excessive licking of the vulva can lead to skin irritation or infection. A diaper creates a barrier that can help minimize this.
- Deterring Unwanted Attention: A female in heat releases pheromones that attract male dogs. While a diaper is not a form of contraception and should never be relied upon to prevent pregnancy, it can help contain the scent and act as a physical barrier, discouraging unwanted advances during walks or in multi-dog households.
Beyond the heat cycle, DIY diapers can also be adapted for other health-related needs, such as managing urinary incontinence in senior dogs, protecting surgical incisions, or handling travel-related accidents. The versatility of a homemade solution allows you to tailor it to your dog’s specific size and condition.
Gathering Your Supplies: Essential Materials and Tools
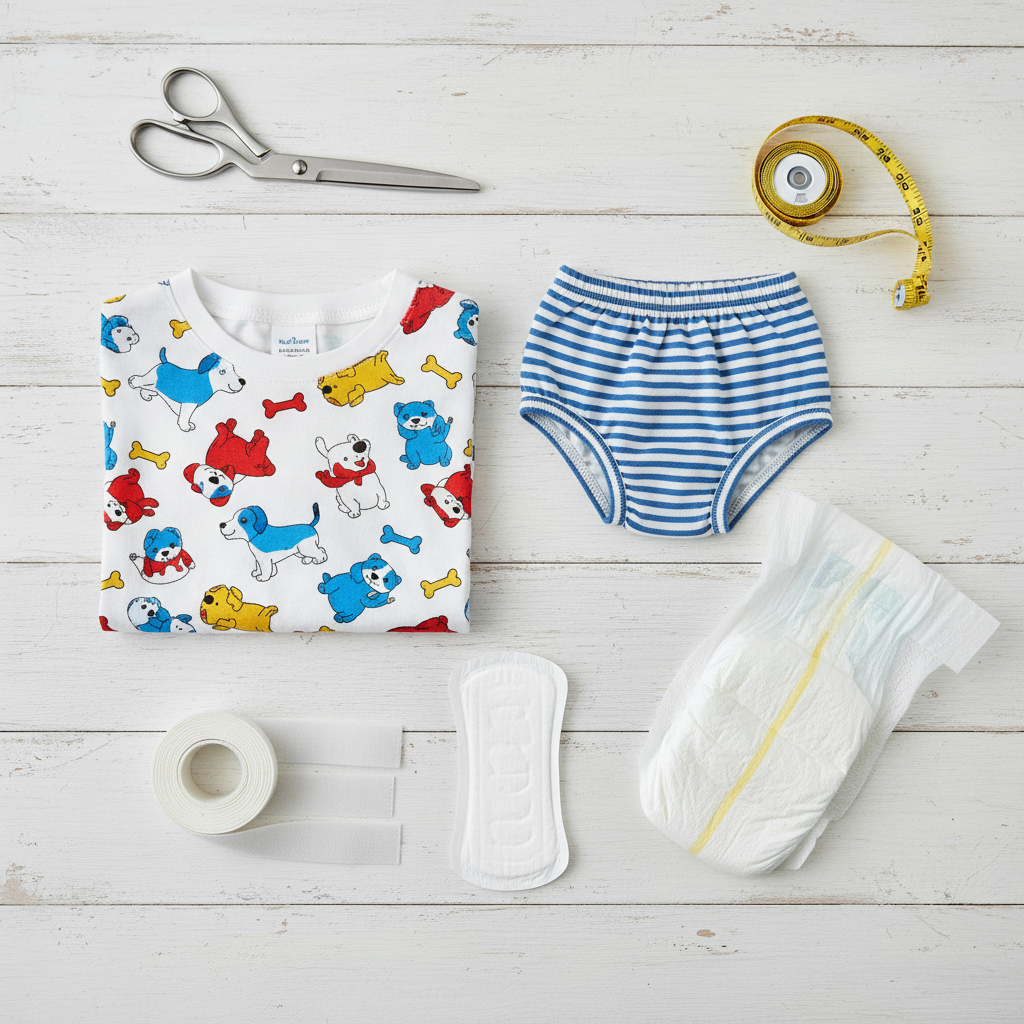
The materials you need will depend on the method you choose. Most options utilize common household items, making them highly accessible. Below is a comprehensive list of potential supplies. We recommend gathering everything you need before you begin to ensure a smooth process.
Core Supplies (Applicable to most methods):
- Measuring Tape: Crucial for achieving a custom, comfortable fit.
- Scissors: A sharp pair of fabric scissors will make clean cuts.
- Absorbent Material: Standard women’s sanitary pads (unscented), incontinence pads, or even folded paper towels can be used to line the diaper.
- Fasteners: Depending on the design, you may need safety pins, adhesive Velcro strips, or sew-on Velcro/snaps.
For specific methods, you will require different base materials. Here is a comparison to help you choose the best approach for your skill level and available resources.
| Method | Primary Material | Additional Tools/Fasteners |
|---|---|---|
| No-Sew T-Shirt | Old cotton t-shirt (size appropriate for your dog) | Scissors only |
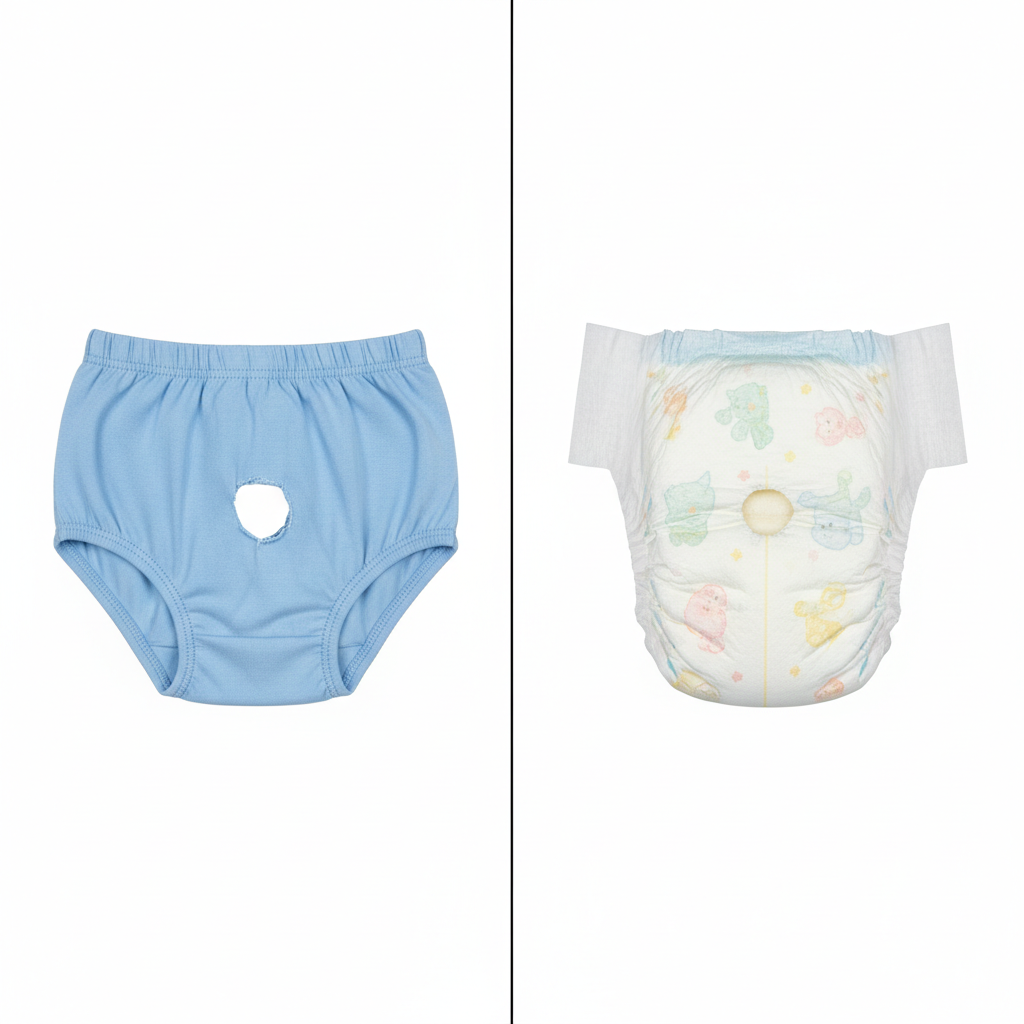
| Adapted Underwear | Children’s underwear or men’s briefs | Scissors, sanitary pad |
| Adapted Baby Diaper | Disposable baby diaper (size appropriate for your dog’s weight) | Scissors, sanitary pad |
| Custom-Sewn Panty | Fabric (e.g., cotton, flannel for lining; PUL/waterproof fabric for outer layer) | Sewing machine or needle/thread, elastic, sew-on Velcro or snaps, paper for pattern |
Expert Tip: When selecting fabrics or materials, always prioritize your dog’s comfort. Choose soft, breathable fabrics like cotton to prevent chafing and skin irritation. If using a waterproof layer, ensure the inner lining is absorbent and soft against your dog’s skin.
Method 1: The No-Sew T-Shirt Diaper (Quick & Easy)
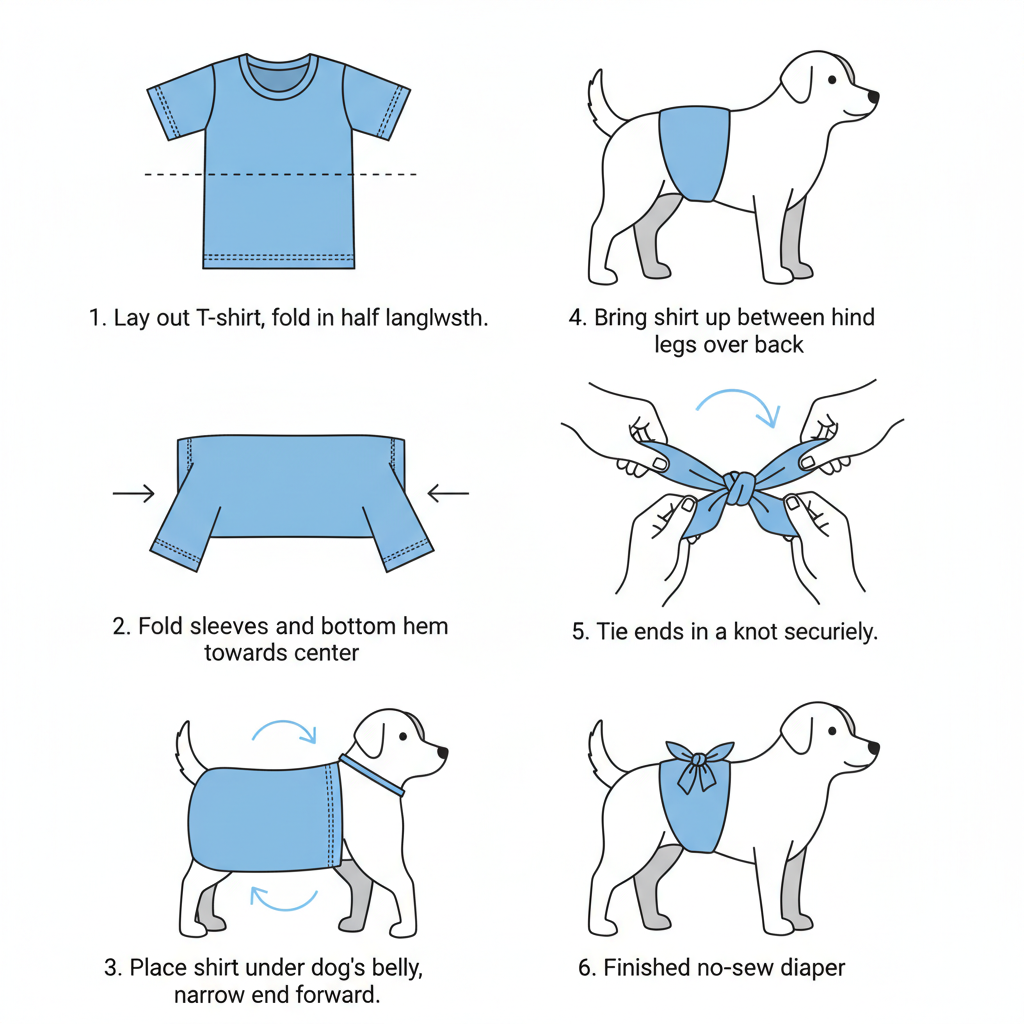
This is the fastest and simplest method, perfect for an emergency or for those who do not sew. It requires only an old t-shirt and a pair of scissors. The key is to select a shirt size that corresponds with your dog’s size—a small shirt for a small dog, a large or extra-large for a bigger breed.
- Lay Out the T-Shirt: Place the t-shirt flat on the floor or a table, with the front side facing up.
- Fold the Shirt: Fold the bottom third of the shirt up towards the collar. The width of this folded section should be wide enough to comfortably cover your dog’s underbelly and wrap around their hindquarters.
- Position on Your Dog: Gently place your dog over the shirt. The folded edge should be on their back, just above the base of the tail, and the collar of the shirt should be underneath them, pointing towards their head.
- Wrap and Secure: Pull the back part of the shirt (with the sleeves) forward through your dog’s back legs. Bring the sleeves up and around their waist, tying them securely but comfortably on top of their back. The knot should be snug enough to hold the diaper in place but not so tight that it restricts movement or breathing. You should be able to fit two fingers comfortably under the tied sleeves.
- Create the Tail Hole: Once secured, feel for the location of your dog’s tail. Carefully mark the spot and remove the diaper. Cut a small ‘X’ or a small circle for the tail. It is better to start small and enlarge the hole as needed to ensure a snug fit that prevents leaks.
- Add Absorbent Pad: Open the diaper and place a sanitary pad inside the section that will cover your dog’s vulva. Re-tie the diaper on your dog.
This method is excellent for temporary use. Because it’s not perfectly form-fitting, be sure to check it periodically to ensure it hasn’t shifted out of place.
Method 2: Adapting Human Underwear or Baby Diapers
Repurposing items designed for humans is another straightforward and effective no-sew approach. Both children’s underwear and disposable baby diapers can be modified in minutes.
Adapting Children’s Underwear or Briefs
Stretchy cotton underwear provides a comfortable and breathable option. Choose a size that will fit snugly around your dog’s waist. For example, a toddler size might work for a Chihuahua, while a larger child’s size or men’s briefs may be needed for a Labrador.
- Position the Underwear: Hold the underwear against your dog’s hindquarters with the waistband sitting comfortably on their back, just as you would for the t-shirt method.
- Mark the Tail Position: Identify where the base of the tail is and mark the spot on the fabric.
- Cut the Tail Hole: Remove the underwear and cut a small vertical slit or a small circle at the marked spot. Again, start small and adjust the size for a snug fit around the tail.
- Insert Pad and Fit: Place an adhesive sanitary pad inside the underwear. Slip your dog’s tail through the hole and pull the underwear up over their hind legs, settling the waistband on their back. The natural elasticity should hold it in place for many dogs, but for more active dogs or those with a slender build, you may need to use suspenders or a belly band to keep it from slipping down.
Adapting a Disposable Baby Diaper
Disposable baby diapers are highly absorbent but are designed for a human’s anatomy. The key modification is creating a hole for the tail.
- Select the Right Size: Choose a baby diaper size based on your dog’s weight. This often requires some trial and error.
- Unfold and Position: Unfold the diaper and hold it against your dog’s underside and back. The tabbed side should be on their back.
- Mark and Cut for the Tail: As with the other methods, locate the base of the tail and mark the diaper. Cut a hole for the tail to pass through.
- Fasten the Diaper: Pull the tail through the hole and wrap the diaper around your dog. Secure the adhesive tabs on their back. Ensure the fit is snug but not constricting around the legs or waist.
Ensuring Comfort, Fit, and Proper Hygiene
Creating the diaper is only half the battle; proper use is critical for your dog’s health and comfort. An ill-fitting or poorly maintained diaper can lead to serious issues like skin infections, urinary tract infections (UTIs), and significant discomfort.
Achieving the Perfect Fit
A diaper should be snug enough to prevent leaks but loose enough to avoid chafing or restricting movement. A general rule is that you should be able to comfortably slide two fingers between the diaper’s edge and your dog’s body, both at the waist and around the legs. Watch your dog’s behavior. If she is constantly trying to remove the diaper, seems to be in pain, or is walking abnormally, it is likely too tight or uncomfortable.
Hygiene is Non-Negotiable
Maintaining a strict hygiene routine is the most important aspect of using dog diapers.
- Frequent Changes: The diaper and/or its absorbent liner must be changed frequently—at a minimum, every 3-4 hours, or immediately once you notice it is soiled. Leaving a wet or soiled diaper on your dog for extended periods creates a breeding ground for bacteria.
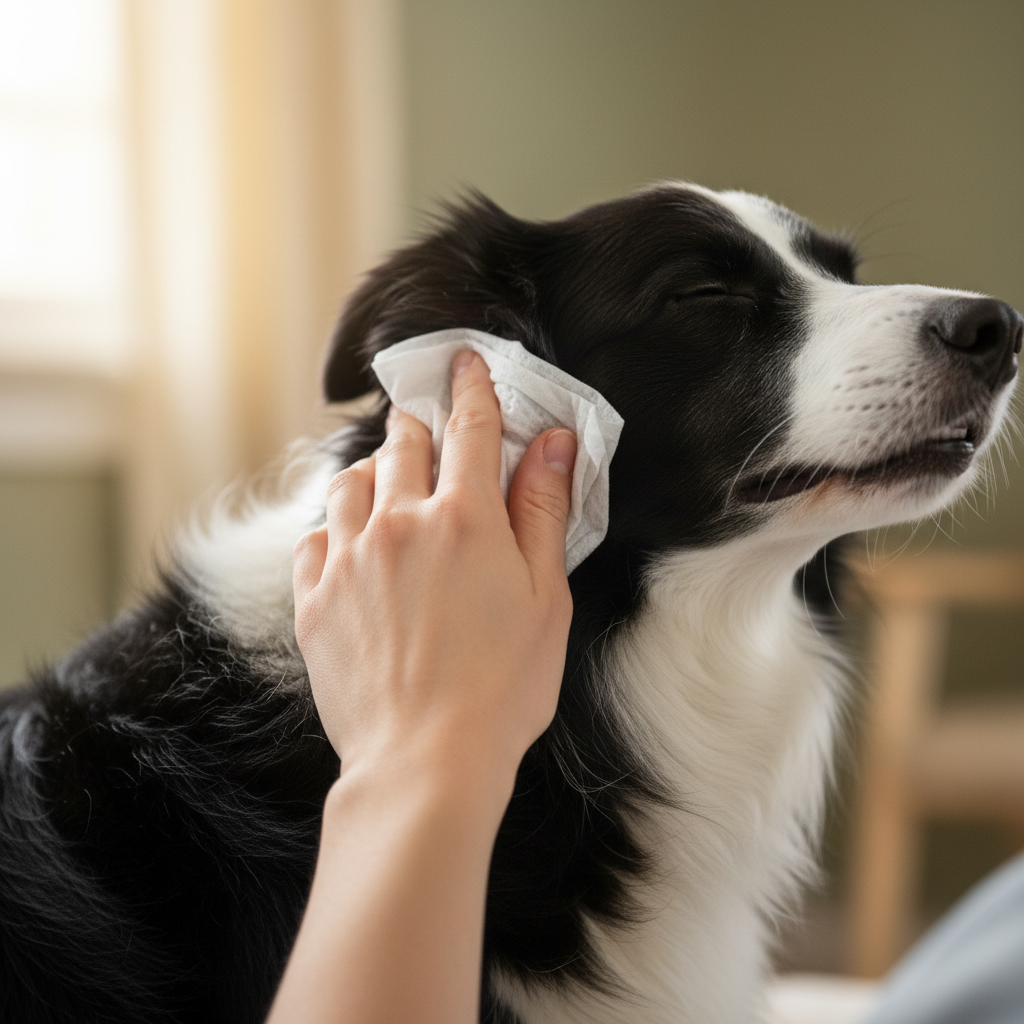
- Regular Cleaning: Each time you change the diaper, gently clean the area around your dog’s vulva and hindquarters with a pet-safe, unscented wipe or a soft, damp cloth. This removes residual discharge and urine, preventing skin scald and irritation. Ensure the area is completely dry before putting on a fresh diaper.
- Diaper-Free Time: It is crucial to give your dog supervised ‘diaper-free’ time each day. This allows her skin to breathe and helps prevent moisture-related skin problems. You can confine her to an easily cleaned area of your home, such as a tiled kitchen or a room with a washable throw rug, during these breaks.
- Washing Reusable Diapers: If you use a t-shirt or custom-sewn diaper, wash it after each use. Use a gentle, pet-safe, fragrance-free detergent and rinse thoroughly to remove any soap residue that could irritate your dog’s skin.
Veterinary Insight: Be vigilant for any signs of skin irritation, such as redness, rashes, sores, or a foul odor. If you notice any of these symptoms, discontinue diaper use immediately and consult your veterinarian. These can be signs of a developing skin infection or contact dermatitis that requires medical attention.
Conclusion
Creating a DIY dog diaper is an empowering skill for any pet owner. Whether you opt for a quick no-sew solution or a durable custom-sewn panty, the ability to craft a comfortable and effective diaper at home offers significant benefits in cost, convenience, and customization. These homemade options allow you to manage your dog’s heat cycle with confidence, keeping both your pet and your home clean.
Ultimately, the best diaper is one that fits well, is made of safe materials, and is used as part of a rigorous hygiene routine. Always prioritize your dog’s comfort, monitor her skin for any signs of irritation, and provide plenty of diaper-free time. By following the guidance in this article, you are well-equipped to handle your dog’s heat cycle with compassion and care, strengthening the bond you share with your beloved companion.