Service Dog Secrets: Teach Your Dog to Open Accessible Doors on Command
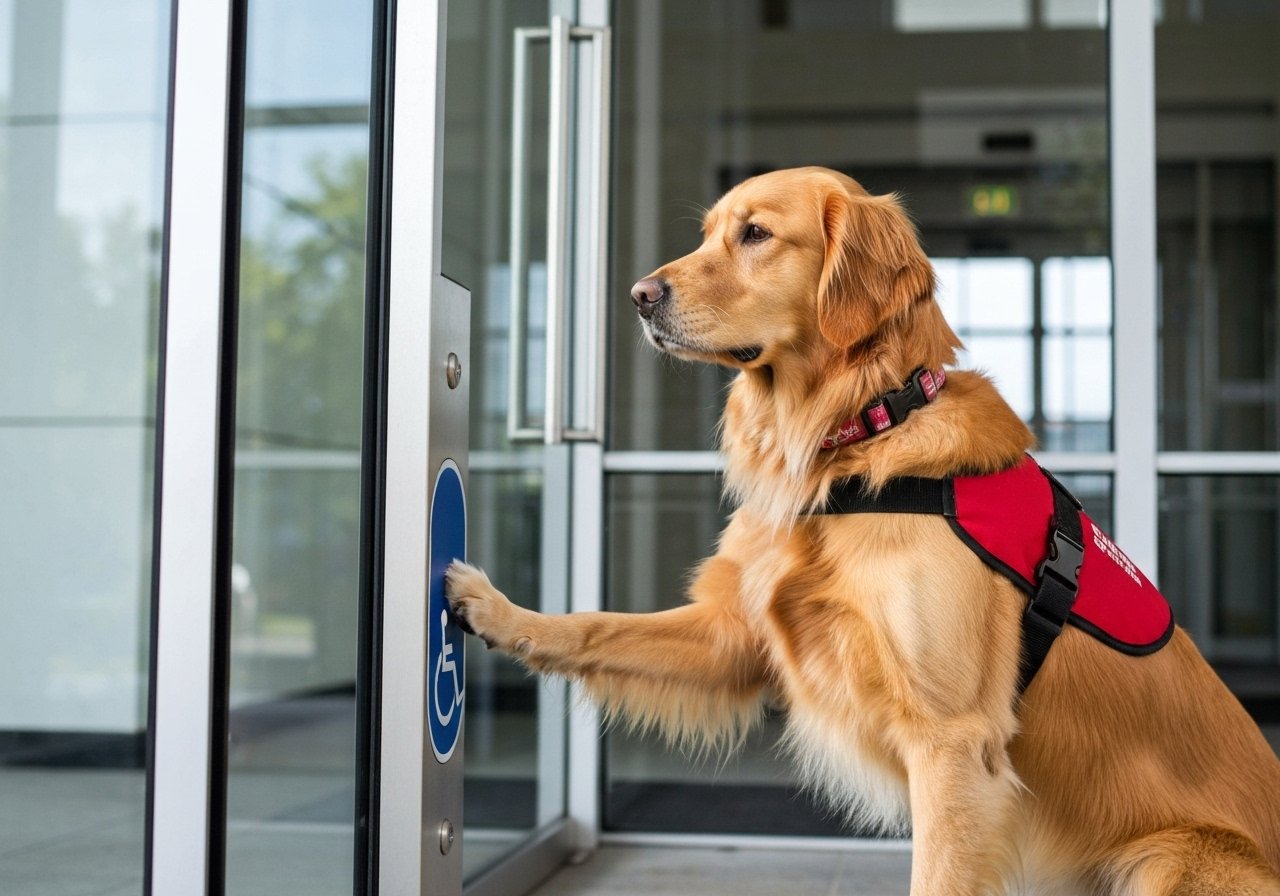
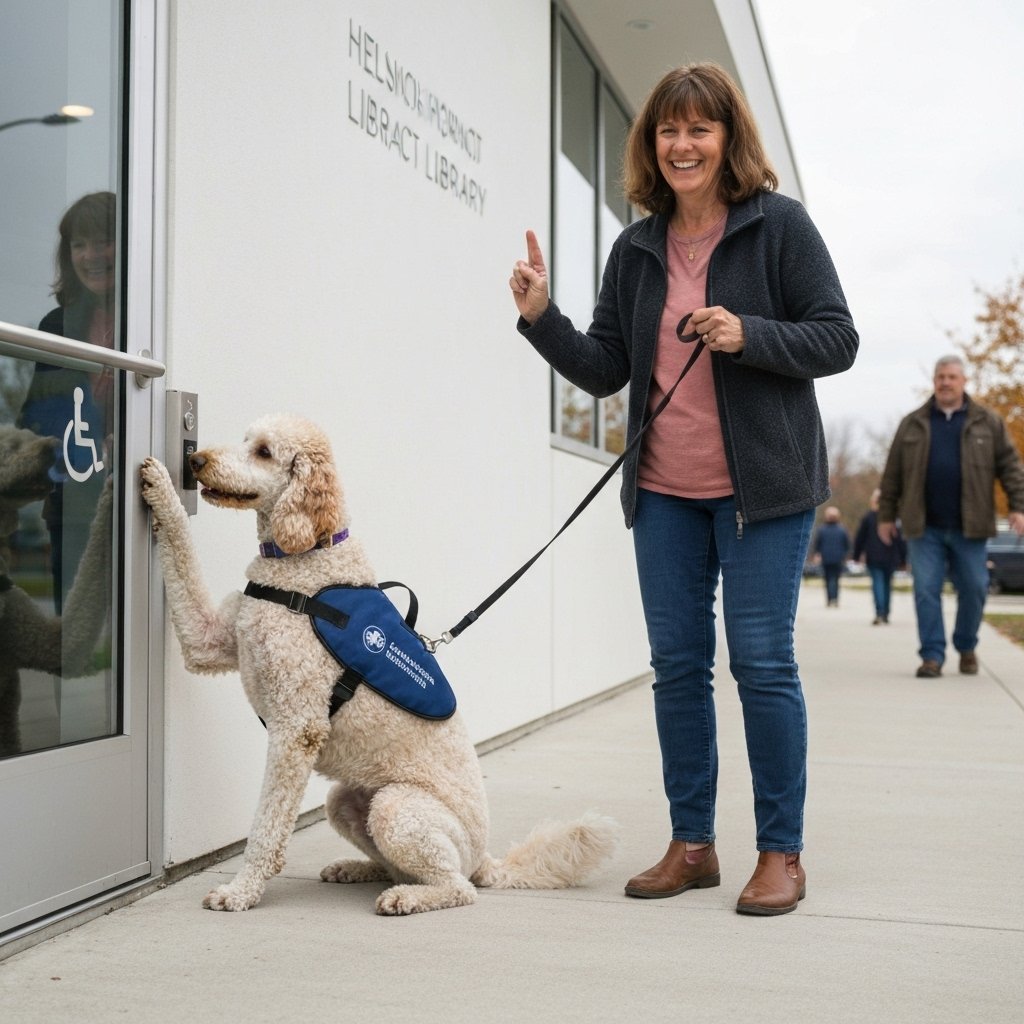
For many individuals with disabilities, a service dog is not just a companion but a vital partner in navigating the world with greater independence. One of the most empowering tasks a service dog can learn is to open doors by activating accessible push plates. This skill can transform daily life, turning impassable barriers into seamless entryways. However, teaching this command requires more than just a few treats; it demands patience, precision, and a deep understanding of canine behavior.
This guide is designed for handlers who have already established a strong foundation of obedience with their dogs. It breaks down the complex process of training this advanced task into manageable, sequential steps. We will delve into the necessary prerequisites, the specific equipment you’ll need, and a detailed, positive-reinforcement-based training plan. By following these professional techniques, you can methodically teach your canine partner to perform this crucial function safely and reliably, strengthening your bond and enhancing your mobility.
Prerequisites: Is Your Dog Ready for This Task?
Foundational Skills and Essential Equipment
Before embarking on this advanced training journey, it is critical to conduct an honest assessment of your dog’s current skill set and temperament. Attempting to teach a complex task like opening doors without the proper foundation can lead to frustration for both you and your dog. A successful candidate for this training is not just intelligent, but also focused, confident, and well-versed in several key behaviors.
Essential Foundational Commands
Your dog should demonstrate mastery of the following skills in a variety of environments, not just at home:
- Target Training (‘Touch’): This is the cornerstone of our training method. Your dog must reliably touch a target (your hand, a sticky note, or a target stick) with its nose or paw on command. This existing skill will be shaped into the ‘push’ action required for the button.
- Solid ‘Stay’ and ‘Wait’: Your dog will need to hold a position while you move to the door and must wait for the door to open fully before proceeding. This impulse control is non-negotiable for safety, preventing the dog from bolting through a partially open door.
- Excellent Public Focus: The dog must be able to ignore distractions common in public spaces, such as pedestrians, sounds, and other animals. Their primary focus should remain on you and the task at hand.
- General Obedience: A reliable ‘sit,’ ‘down,’ and ‘heel’ ensures the dog is manageable and attentive throughout the training process and during real-world application.
Required Training Equipment
Gathering the right tools beforehand will streamline the training process. You will need:
- High-Value Rewards: Small, soft, and highly palatable treats that your dog loves. This is for rewarding a challenging new skill, so standard kibble may not be motivating enough.
- Clicker (Optional): If you are a proponent of clicker training, it can be an excellent tool for precisely marking the desired behavior of pressing the button.
- Target Stick or Stationary Target: A target stick can help guide the dog’s nose or paw. Alternatively, a brightly colored sticky note or a commercially available training target can be used.
- Mock Push Plate (Recommended): For initial training, it is highly beneficial to use a practice button. You can purchase training aids that mimic the feel and sound of a real accessible button or create a simple DIY version mounted on a board. This allows you to train in a controlled environment without needing constant access to a public door.
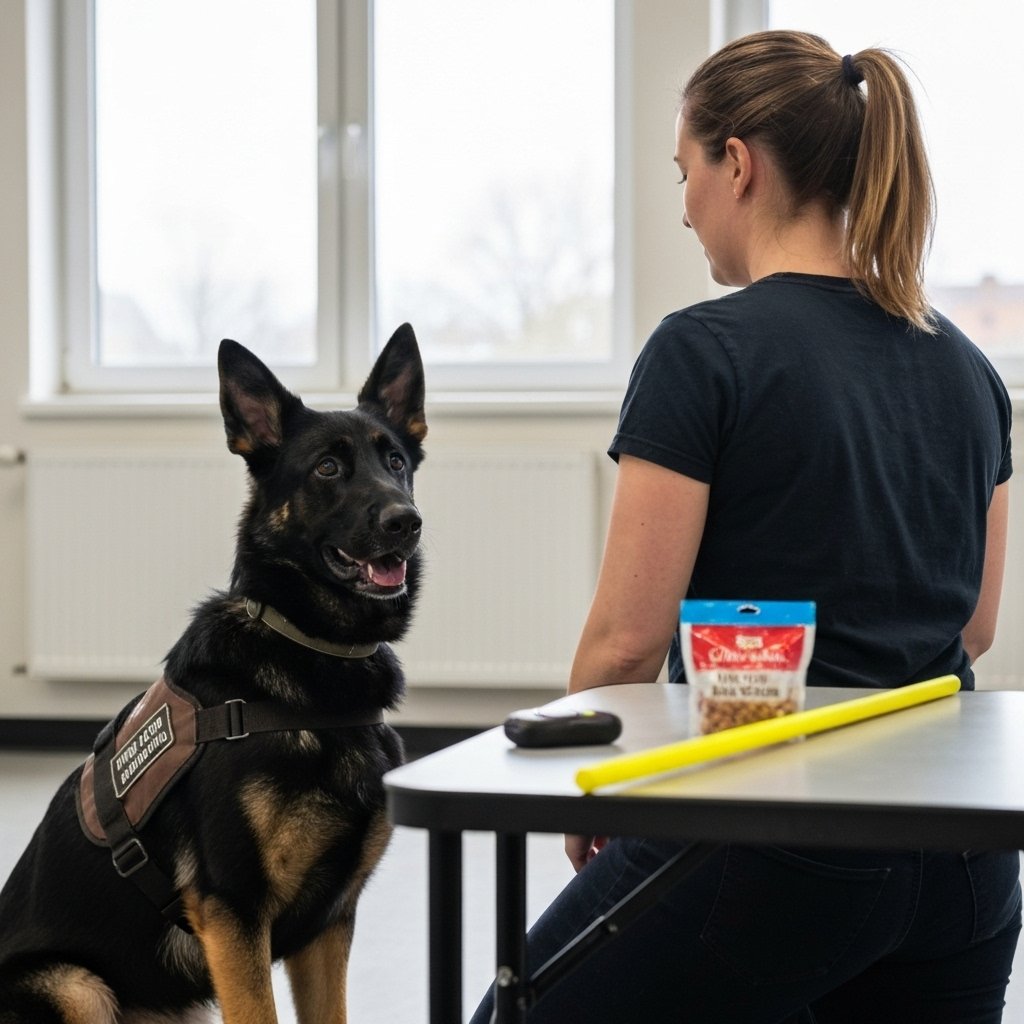
Step-by-Step Guide to Training the ‘Push’ Command
The Core Training Method: Shaping the Behavior
This phase focuses on shaping your dog’s existing ‘touch’ command into a deliberate ‘push’ action. The key is to break the behavior down into tiny, achievable increments, rewarding each successful step along the way. Patience is paramount. Never rush your dog; allow them to think and problem-solve.
-
Phase 1: Reinforce the ‘Touch’
Begin by refreshing the ‘touch’ command with your chosen target (e.g., a sticky note). Hold it in your hand and give your cue. When your dog touches it with their nose or paw, mark the behavior (with a ‘Yes!’ or a click) and reward immediately. Repeat this until the response is quick and enthusiastic.
-
Phase 2: Transfer the Target to a Vertical Surface
Place the sticky note on a wall or cabinet at a height similar to an accessible door button. Give your ‘touch’ cue. Your dog may be hesitant at first. Encourage them and reward any interaction with the target. The goal is for them to confidently touch the target on the wall.
-
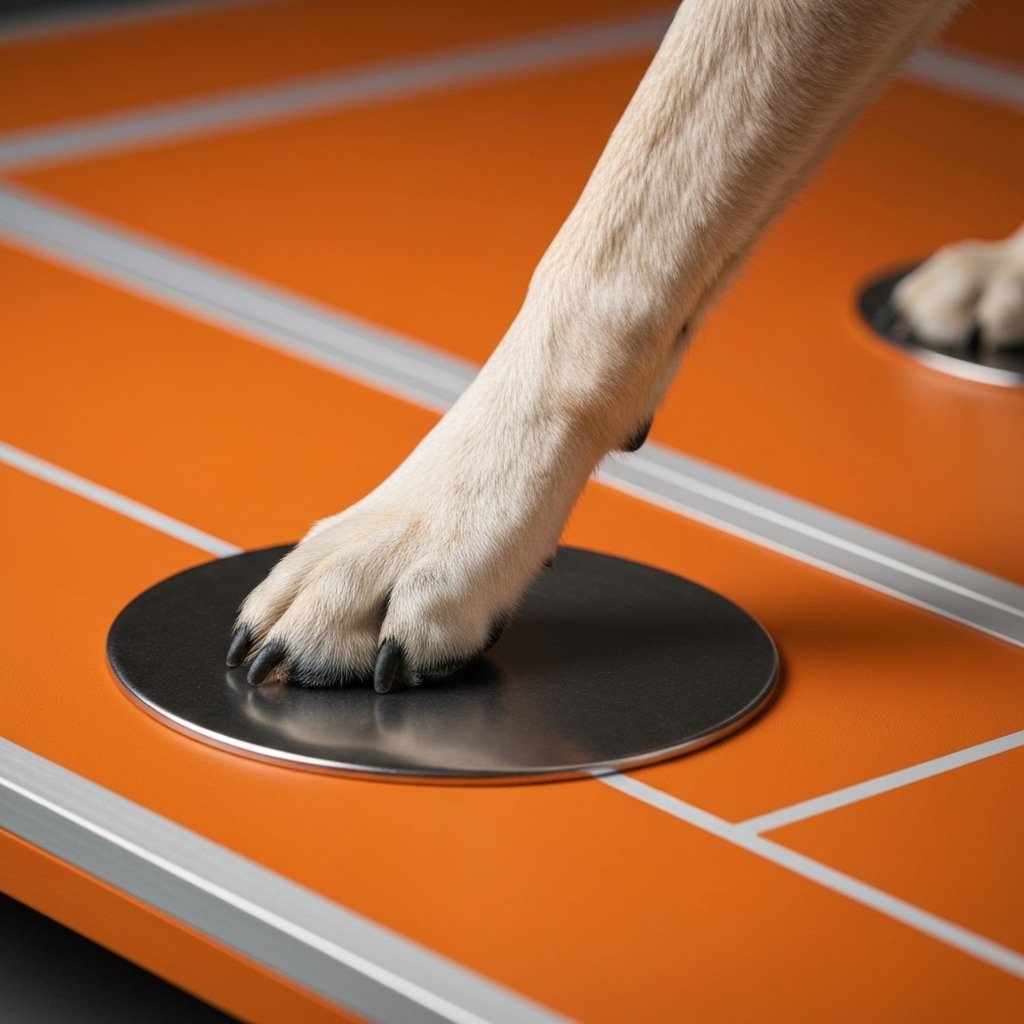
Phase 3: Introduce the Mock Button
Replace the sticky note with your mock push plate. Place it on the floor initially. Most dogs will be curious. Reward any investigation—sniffing, nudging, or pawing. Now, give your ‘touch’ cue. Mark and reward any contact with the button. At this stage, we are not concerned with the force of the touch, only the contact itself.
-
Phase 4: Shape the ‘Touch’ into a ‘Push’
Once your dog is reliably touching the mock button, begin to selectively reward only the firmer touches. This is the shaping process. Ignore light taps and wait for a touch with more pressure. When your dog applies enough force to make a slight sound or movement, offer a jackpot of treats and praise. This teaches them that pressure is what earns the reward. Gradually mount the mock button onto a wall and repeat the process.
-
Phase 5: Add the Verbal Cue
When your dog is consistently pushing the button with enough force to activate it, you can add your formal verbal cue. Say the cue—such as ‘Push’ or ‘Button’—just before the dog performs the action. After several successful repetitions, the dog will begin to associate the word with the action. Start to test this by giving the cue when the dog is not already moving toward the button.
Expert Tip: Keep training sessions short and positive, ideally 5-10 minutes at a time, a few times a day. Ending on a successful repetition helps maintain the dog’s enthusiasm for the task.
From Home to the Real World: Generalizing the Skill
Proofing the Behavior in Diverse Environments
A command is only truly learned when a dog can perform it reliably in various locations and under different conditions. This process, known as generalization or ‘proofing,’ is a critical step for any service dog task. The goal is to make the ‘push’ command as automatic as ‘sit,’ regardless of the environment.
A Gradual Approach to Public Access
Do not take your dog from your quiet living room directly to a busy shopping mall. This can be overwhelming and set back your training. Follow a structured, gradual exposure plan:
- Quiet Public Spaces: Start at a location with a real accessible door but minimal traffic, such as a library or community center during off-peak hours. Let your dog acclimate to the new sights and smells before you begin training.
- Moderate Distractions: Progress to places with more foot traffic, like the entrance to a pet-friendly hardware store or a park building. Practice the command with people walking by at a distance.
- High-Distraction Environments: The final stage is to practice in busy settings like medical buildings, shopping centers, or university campuses. These environments test your dog’s focus and the reliability of the command under pressure.
Varying the Target
Accessible door buttons are not uniform. They come in different shapes (round, square), sizes, and materials. It is essential to practice on as many different types as possible. When you encounter a new type of button, treat it like a mini-training session. Let your dog investigate it and reward them generously for successfully pushing the new button. This teaches them to generalize the concept of ‘button’ rather than only recognizing the specific one they learned on.
Safety First: When practicing in public, always ensure the area is clear. Teach your dog to push the button and then immediately look back to you for the next cue, rather than rushing through the door. This prevents accidents and reinforces your role as the team leader.
Common Challenges and Fine-Tuning the Command
Troubleshooting and Advanced Refinements
Even with the best training plan, you may encounter challenges. Understanding how to troubleshoot these common issues is key to progressing. Furthermore, once the basic command is solid, you can add layers of refinement to make the behavior more polished and practical.
Addressing Common Training Problems
| Problem | Solution |
|---|---|
| Dog is hesitant or fearful of the button. | Go back a few steps. Re-introduce the button in a non-threatening way (e.g., on the floor) and reward any interaction. Make sure the button does not make a startlingly loud noise. Use very high-value treats to build a positive association. |
| Dog paws or scratches the button instead of pushing. | This is common for dogs trained with a paw target. Shape the behavior by rewarding only flat, open-paw contact. You can use a cue like ‘Gentle’. Never reward frantic scratching. If the issue persists, switch to training a nose-push instead. |
| Dog only pushes the button lightly, not enough to activate it. | You have raised the criteria too quickly. Go back to rewarding any touch, then gradually increase the required pressure again. Use a clicker to mark the exact moment of a harder push, which provides very clear feedback to the dog. |
| Dog is distracted in public and won’t perform the command. | The environment is too challenging. Increase your distance from the distractions. Work on general focus exercises (‘watch me’) in that environment before re-attempting the ‘push’ command. Ensure your rewards are more interesting than the distractions. |
Advanced Refinements for a Polished Task
Once the basic push is reliable, you can refine the behavior for seamless real-world use:
- Building Duration: Teach your dog to hold the push for a second or two. This can be useful for buttons that require a sustained press. Shape this by delaying your click/reward by a fraction of a second after they make contact.
- Adding Distance: Gradually increase the distance from which you send your dog to the button. Start with a few feet and work your way up as their confidence grows.
- Waiting After the Push: This is a crucial safety step. The dog should not bolt through the door as soon as it opens. After they push the button, cue a ‘wait’ or have them automatically turn and sit, looking to you for the release cue to proceed through the door.
Conclusion
Teaching a service dog to open an accessible door is a significant achievement that profoundly enhances a handler’s independence. This journey is a testament to the power of clear communication, patience, and the incredible bond you share with your canine partner. Remember to progress at your dog’s pace, celebrate every small victory, and always prioritize positive reinforcement. By mastering the foundational skills, meticulously shaping the behavior, and methodically proofing the command in the real world, you will cultivate a skill that is not only impressive but truly life-changing. Your dog’s ability to reliably perform this task is a direct reflection of your dedication as a team, opening new doors to a more accessible world.