How To Teach ‘Go Around’: The Best Distance Command For Hikers

Hiking with a canine companion offers an unparalleled sense of freedom and adventure. The shared experience of exploring rugged trails, dense forests, and breathtaking vistas strengthens the bond between owner and dog. However, this freedom comes with responsibility. Navigating the unpredictable environment of the backcountry requires clear communication and reliable commands, especially when your dog is off-leash or on a long line. Standard commands like ‘sit’ and ‘stay’ have their place, but they fall short when you need to direct your dog’s movement around an obstacle from thirty feet away.
This is where the ‘Go Around’ command proves invaluable. It is a directional cue that instructs your dog to circumnavigate an object, be it a mud puddle, a thorny bush, a group of fellow hikers, or even wildlife. More than just a trick, ‘Go Around’ is a critical safety tool that allows you to manage your dog’s path proactively, preventing tangles, avoiding hazards, and ensuring a smoother, safer journey for everyone. This comprehensive guide will provide a step-by-step methodology for teaching this essential distance command, transforming your trail experiences from potentially chaotic to confidently controlled.
Why ‘Go Around’ is an Essential Command for Trail Safety

On a well-maintained path, walking with your dog is straightforward. But the reality of hiking often involves narrow passages, unexpected obstacles, and sensitive environments. The ‘Go Around’ command is a versatile solution to numerous common trail challenges, empowering you to guide your dog with precision and foresight.
Key Scenarios Where ‘Go Around’ Excels:
- Hazard Avoidance: The most obvious benefit is steering your dog clear of danger. This can include patches of poison ivy, broken glass, sharp rocks, or unstable ground. Instead of a frantic recall or a leash pull, a calm ‘Go Around’ directs them on a safer path.
- Obstacle Navigation: Large puddles, fallen logs, and dense thickets can block the trail. This command allows your dog to find a clear path without getting stuck, dirty, or tangled, which is especially useful when you are navigating a different line yourself.
- Trail Etiquette: When encountering other hikers, mountain bikers, or equestrians on a narrow trail, ‘Go Around’ can be used to move your dog to one side, creating space and demonstrating responsible pet ownership. It is a polite and effective way to manage interactions without needing to shorten the leash entirely.
- Leash Management: For those who hike with their dog on a long line, tangles around trees, rocks, and trail signs are a constant frustration. Teaching your dog to ‘Go Around’ the object on cue can prevent these snags, saving time and maintaining a pleasant hiking rhythm.
- Wildlife Encounters: Directing your dog to go around a snake, a porcupine, or even a deer carcass on the trail can be a life-saving application of this command, preventing dangerous or unwanted interactions.
Ultimately, mastering ‘Go Around’ builds your dog’s confidence and problem-solving skills. They learn to look to you for guidance when faced with an environmental question, reinforcing your role as a trusted leader. This level of communication elevates your partnership from simply sharing a walk to functioning as a cohesive team in the wilderness.
Foundation and Gear: Preparing for Success

Before you begin teaching a new command, especially one that involves distance and direction, it is crucial to set the stage for learning. A solid foundation of basic obedience and the right equipment will dramatically accelerate the training process and reduce frustration for both you and your dog.
Prerequisite Skills:
Ensure your dog has a reliable understanding of a few key concepts before you start. While not strictly mandatory, having these in place will make teaching ‘Go Around’ much smoother:
- Target Training (e.g., ‘Touch’): A dog that knows how to touch an object (like your hand or a target stick) with its nose already understands the concept of interacting with specific items in its environment. This can be a building block for directing them toward and then around an object.
- Positive Association with Objects: Your dog should be comfortable and curious about new objects. Use positive reinforcement to build their confidence around cones, boxes, or other items you might use in training.
- Strong Engagement: Your dog should be able to focus on you and the training task for short periods without becoming overly distracted. Begin training in a low-distraction environment like your living room or backyard.
Essential Training Equipment:
Having the right tools on hand makes the process more efficient and effective. You do not need expensive gear, but these items are highly recommended:
- A Long Line (15-30 feet): This is non-negotiable for teaching distance commands safely. It allows your dog the freedom to move away from you while ensuring you maintain control and can guide them if they get confused. Avoid retractable leashes, which do not offer the same level of control.
- High-Value Treats: These should be small, soft, and extra-special treats that your dog loves. Think small pieces of cooked chicken, cheese, or commercial training treats that are more enticing than their everyday kibble.
- A Clicker (Optional): A clicker is a powerful tool for marking the exact moment your dog performs the correct behavior. If you are not familiar with clicker training, you can use a verbal marker word like ‘Yes!’ instead.
- A Target Object: Start with a large, stable object that your dog can easily see and move around. A traffic cone, a large cardboard box, a sturdy chair, or even a prominent tree in your yard are all excellent choices.
The ‘Go Around’ Training Protocol: A Step-by-Step Guide
This training process is broken down into progressive steps. Master each step before moving to the next, and keep your training sessions short and positive—around 5-10 minutes is ideal. The goal is to build your dog’s understanding and confidence gradually.
-
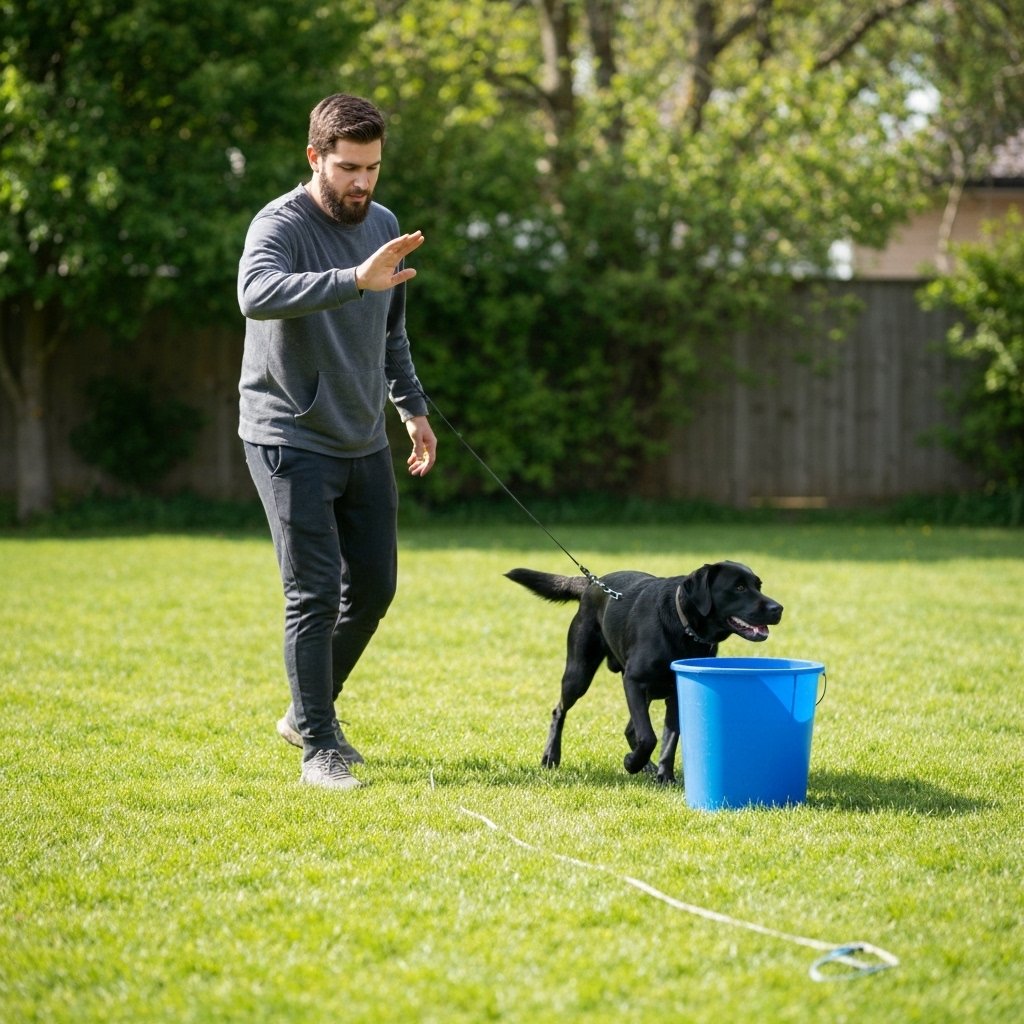
Step 1: Introduce the Object and Lure the Motion
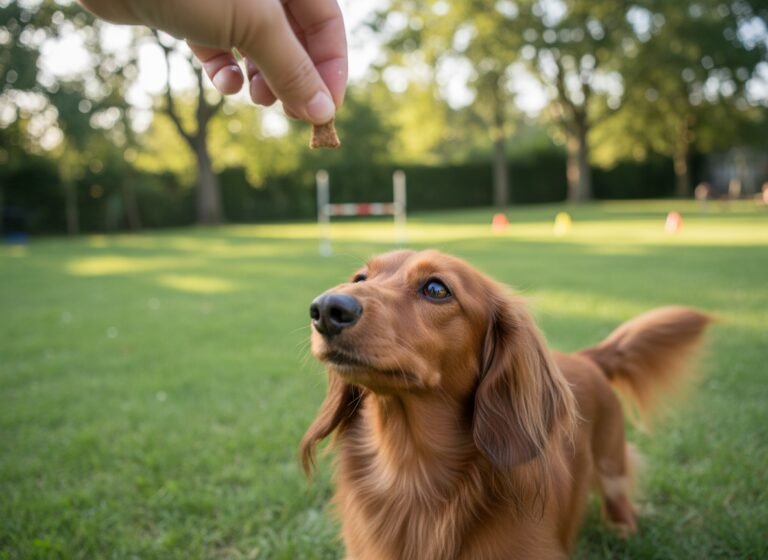
Start in a low-distraction area with your dog on a regular 6-foot leash. Place your target object (e.g., a cone) on the ground. With a high-value treat in your hand, lead your dog toward the cone. As you approach it, use the treat as a lure to guide your dog’s nose around one side of the cone. As soon as they complete the arc around it, click or say ‘Yes!’ and give them the treat. Repeat this 5-10 times, luring them around both the left and right sides of the object.
-
Step 2: Add the Hand Signal
Once your dog is fluently following the treat lure, begin to transition to a hand signal. Use a large, sweeping arm motion in the direction you want them to go around the object. Initially, your hand will still have the treat in it (acting as both lure and signal). As they begin to understand, start making the hand signal first, then use the treat lure if they need help. The sequence becomes: Hand Signal -> Lure if Needed -> Dog Moves Around Object -> Click/Yes! -> Treat.
-
Step 3: Introduce the Verbal Cue
When your dog reliably responds to the hand signal alone, it’s time to add the verbal cue. Say your chosen command, ‘Go Around,’ clearly and once. Immediately follow it with the hand signal you’ve been practicing. When the dog completes the action, click/Yes! and reward enthusiastically. The new sequence is: ‘Go Around’ -> Hand Signal -> Dog Moves Around Object -> Click/Yes! -> Treat. After many repetitions, your dog will begin to associate the verbal cue with the action.
-
Step 4: Fade the Hand Signal and Increase Distance
Now, start to test the verbal cue alone. Say ‘Go Around’ without giving the hand signal. If your dog hesitates, give a smaller version of the signal to help them. When they succeed on the verbal cue alone, give them a ‘jackpot’ reward (multiple treats). At the same time, switch to your long line and begin to gradually increase your distance from the object. Start by standing just a few feet away, then five, then ten, sending them to ‘Go Around’ the object from further away.
-
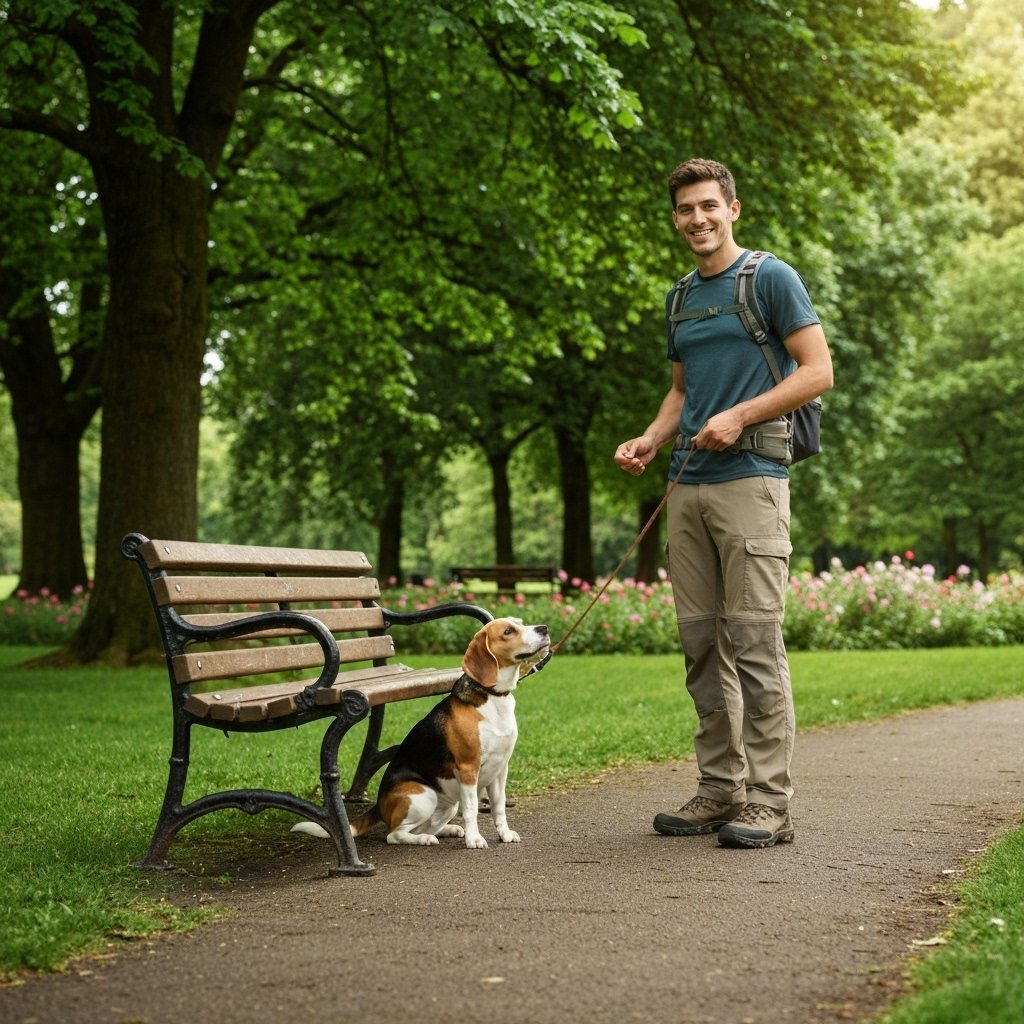
Step 5: Generalize to New Objects and Environments
A command is only useful if it works anywhere. Once your dog can reliably ‘Go Around’ your initial training object in the backyard from a distance, start practicing with different objects. Use trees, park benches, light poles, or backpacks. Start each new object at a close distance and work your way back up. Then, begin practicing in new, slightly more distracting environments, like a quiet park, before eventually trying it on a calm hiking trail.
Troubleshooting Common ‘Go Around’ Roadblocks
Even with a perfect plan, you may encounter challenges during the training process. This is normal. The key is to identify the issue and take a step back to a point where your dog was successful. Avoid getting frustrated, as this will only create a negative association with the command. Here are some common problems and their solutions.
| Problem | Reason & Solution |
|---|---|
| Dog Stops in Front of the Object | The dog may be confused about what to do or is fixated on you for the treat. Solution: Go back to the luring step (Step 1). Make your lure more exaggerated and exciting to get their body moving. Reward any small movement in the correct direction to start. |
| Dog Only Goes One Direction | It’s common for dogs (and people) to have a preferred side. You may have inadvertently practiced one direction more than the other. Solution: Dedicate entire short sessions to practicing only their ‘weaker’ direction. Use a higher-value reward for success on that side to build a stronger positive association. |
| Dog Ignores the Command at a Distance | The distance is likely too great for their current level of training. This is a sign of increasing the challenge too quickly. Solution: Immediately reduce the distance. Go back to the last distance where they were consistently successful and work there for another session before trying to add more space. |
| Dog is Too Distracted in New Environments | The cognitive load of a new environment plus a new command can be overwhelming. Solution: When you change the environment, significantly lower your expectations. Go back to basics—work on a short leash and close to the object, as if you are starting over. Re-build their confidence in the new location before adding distance. |
| Dog Runs Back to Me Instead of Around the Object | This often happens when the dog is insecure or thinks the reward comes from being near you. Solution: After they go around the object, toss the treat on the ground away from you, on the far side of the object. This teaches them that the reward happens ‘out there’ and encourages them to complete the full circle. |
Expert Tip: Always end your training sessions on a high note. If your dog is struggling, ask for a simple behavior they know well, like ‘sit,’ reward it generously, and then end the session. This ensures they always finish with a feeling of success.
Conclusion
Teaching your dog the ‘Go Around’ command is an investment in safety, communication, and mutual trust. It transforms you from a passenger on your dog’s hike into a confident co-pilot, capable of navigating the trail’s challenges as a team. While the process requires patience, consistency, and positive reinforcement, the payoff is immense. The first time you use a calm ‘Go Around’ to effortlessly guide your dog around another hiker or a potential hazard, you will understand its profound value.
Remember that every dog learns at a different pace. Celebrate small victories, keep your training sessions fun and engaging, and never sacrifice your dog’s confidence for the sake of speed. By following the steps outlined in this guide, you will not only teach a reliable distance command but also deepen the bond with your adventurous canine companion, paving the way for countless safe and enjoyable hikes to come.